A practical guide to building a convincing Aliens US Colonial Marine loadout that works for both cosplay and in the real world for airsoft.
This guide exists for one reason: to help you build an Aliens US Colonial Marine loadout that would instantly read as “Aliens” without disappearing down a perfectionist rabbit hole, unobtainable parts, or unnecessary expense.
It is written from direct real world build experience with a view of helping you understand what components matter, which ones carry the visual weight, where accuracy pays off, and where it does not. You should also understand the trade-offs between buying and building, so you can make decisions that suit your time, budget, and patience.
This guide is long by design. The subject demands it.
You already know what Aliens is and why the Colonial Marines look the way they do, right? That's why you're here.
There are two things that will shape your USCM build journey, so let's cover them first:
The guide aims to cover all viable options. There is no right or wrong in which path you take.
What is the 10 metre rule?
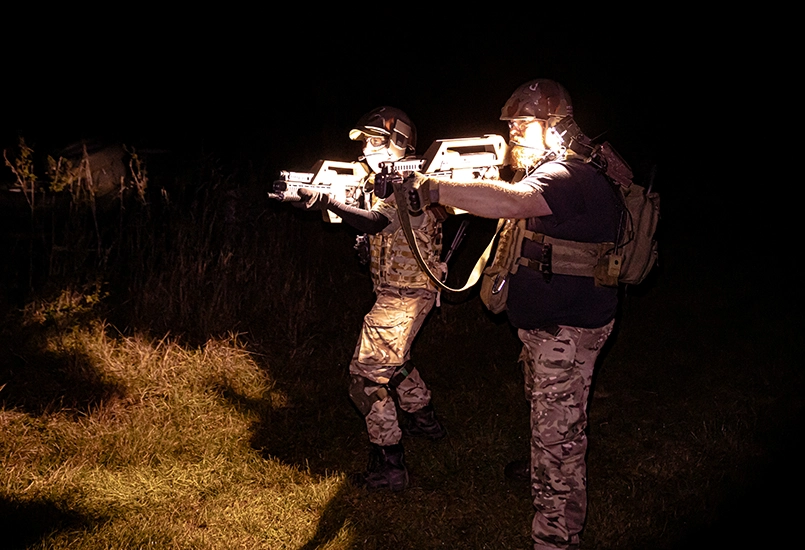
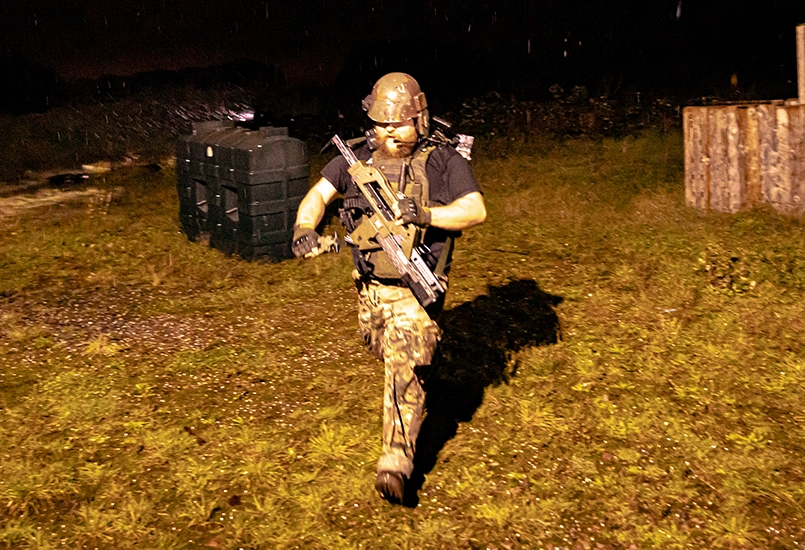
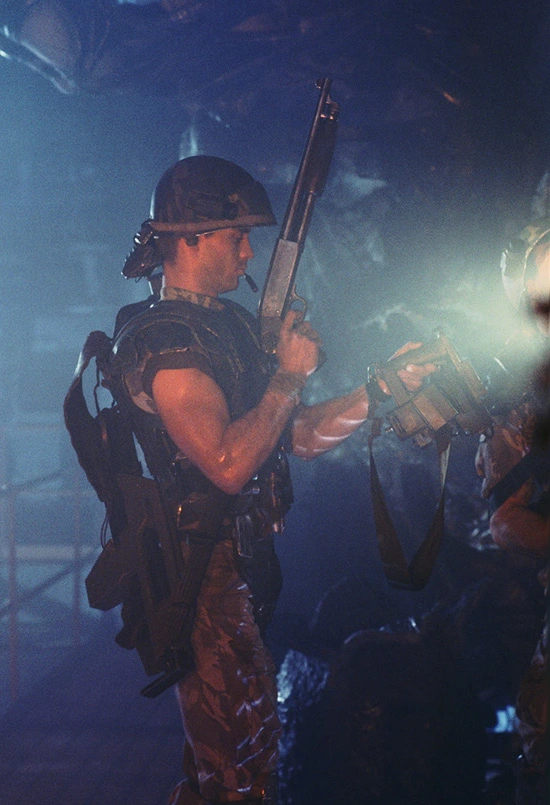
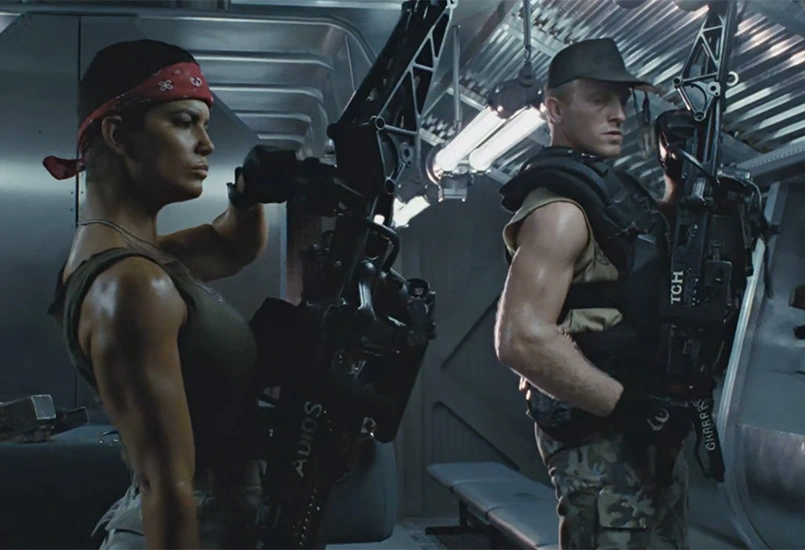
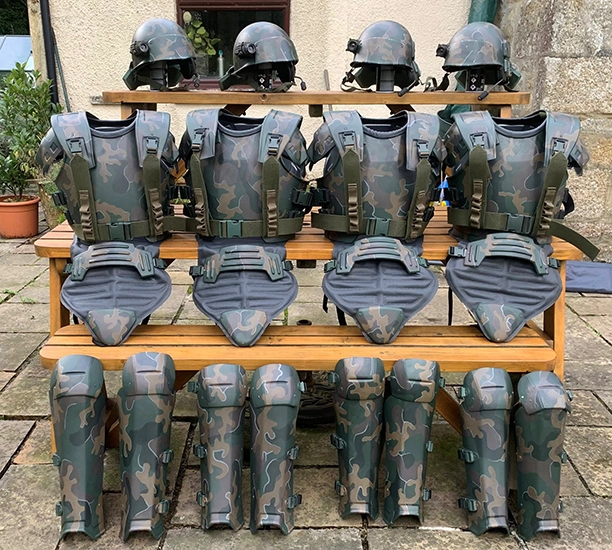
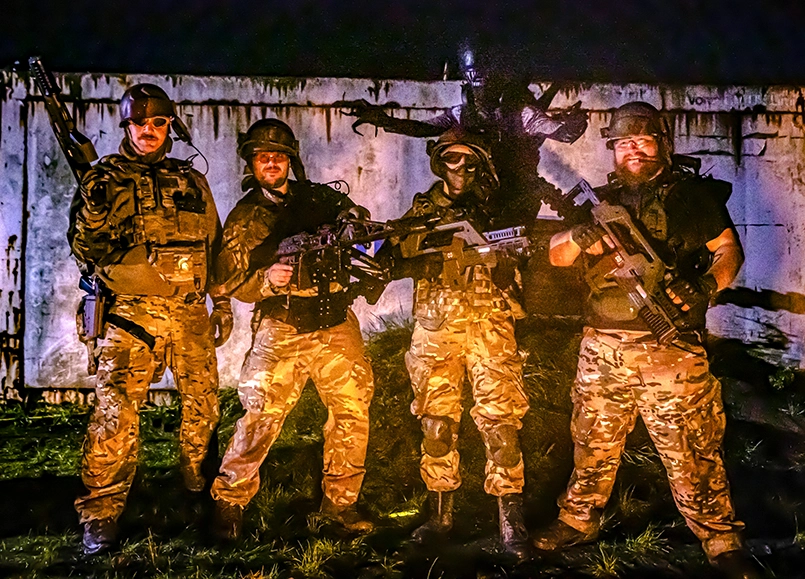
The people in these photos were kitted out for a airsoft Halloween night game with just the M41 Pulse Rifle, helmet and shoulder lamp.
If someone can look at you from 10m away and immediately see you as an US Colonial Marine from Aliens, then the loadout works.
At 10 metres, silhouette, proportions, colours, and a handful of recognisable details from a distance, will matter far more than the fine detail and movie accuracy.
When making props and costumes, this 10m rule of thumb is often used to judge success. In this article, high movie accuracy is not overlooked, but the 10m rule sets the baseline.
You could opt for the 10m rule “good enough” level of detail and have a great looking USCM loadout. Or you can keep pushing for perfection and closer to screen accuracy that stands up to close inspection. Both viewpoints are valid, and when required, this guide highlights the level of screen accuracy.
Depending on which USCM character you want to be, it will dictate one of three general soldier loadout variants you will need.
Deciding on this early will help prevent buying or building the wrong components.
Below is a comparison table of the different USCM loadout components by style. If the row is highlighted then it is required for that style. Unhighlighted means it is a nice-to-have.
| Component | Grunt | Hicks | Hudson | Smartgunner |
|---|---|---|---|---|
| Helmet | ||||
| Camo Trousers/Pants | ||||
| Camo Shirt | ||||
| Sleeveless shirt | ||||
| Body Armour | ||||
| Shoulder Lamp | ||||
| Motion Tracker | ||||
| ME3 Welder | ||||
| M41A Pulse Rifle | ||||
| M56 Smartgun | ||||
| Ithaca 37 Shotgun | ||||
| S&W 39 Pistol | ||||
| Flamethrower | ||||
| M40 Grenades | ||||
| Belt Tool | ||||
| Commando Knife | ||||
| Patches |
The camouflage is the foundation of the entire US Colonial Marine look. Get this wrong and everything layered on top will struggle to convince, regardless of how accurate the armour or weapons are.
There are two completely different camouflage concepts to understand:
These are not interchangeable. Mixing them incorrectly is one of the most common mistakes.
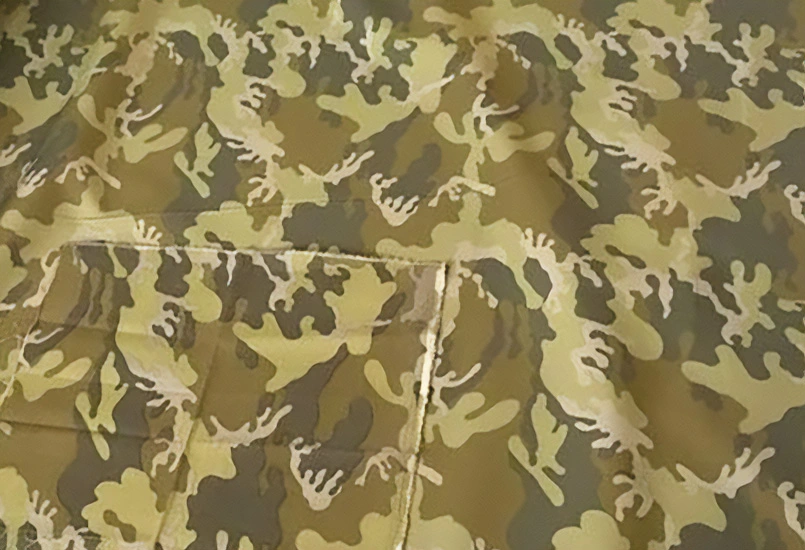
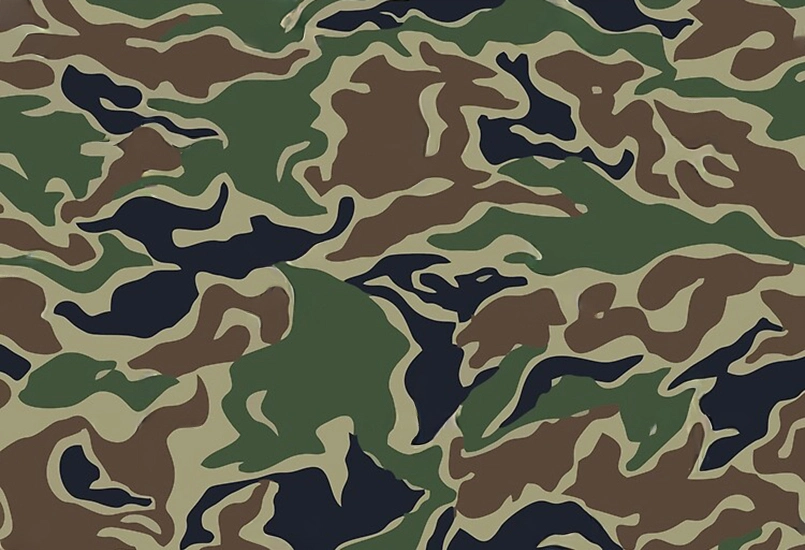
The original US Colonial Marine uniform camouflage was produced specifically for the film in the late 1980s by a London, UK textile manufacturer. It was not a standard military pattern and was never widely issued.
Over the years it has been incorrectly referred to as “Frog Leaf” pattern (1940’s US Pacific operations). This camo is not accurate.
True screen-accurate reproductions do exist today, recreated from original reference material. These are typically made to order and are priced accordingly. If you are aiming for full movie accuracy and are happy with the cost, this is the correct route.
One supplier of screen-accurate USCM camo uniforms is Chef Creations in the UK.
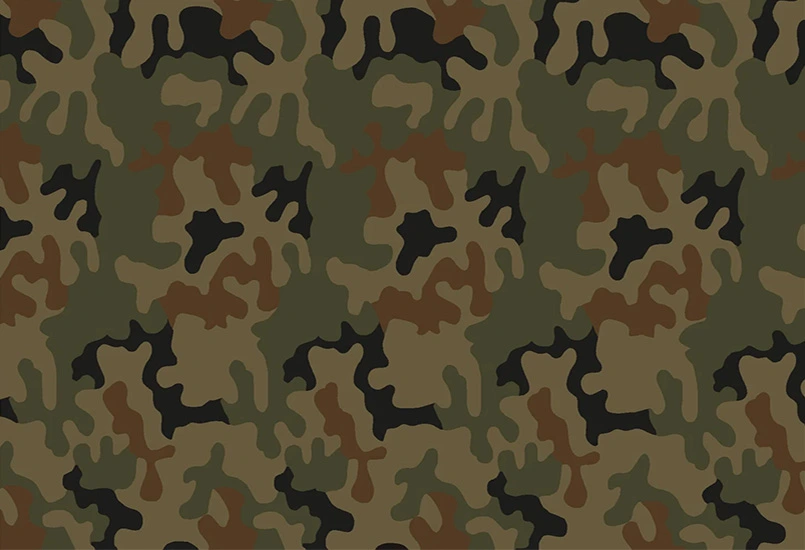
If you want something that holds up far better at closer inspection without going full screen-accurate, Polish Desert camouflage is the closest readily available alternative.
You may also see this referred to as CPU, which is simply the abbreviated name for the same pattern.
Out of the box, Polish Desert camo tends to look too clean. To sit convincingly in a USCM loadout it benefits from weathering: dirt, grime, sweat staining, and general wear. Once knocked back, the pattern shape reads extremely well.
You can find Polish Desert camo from various military surplus and tactical clothing suppliers such as Military First.
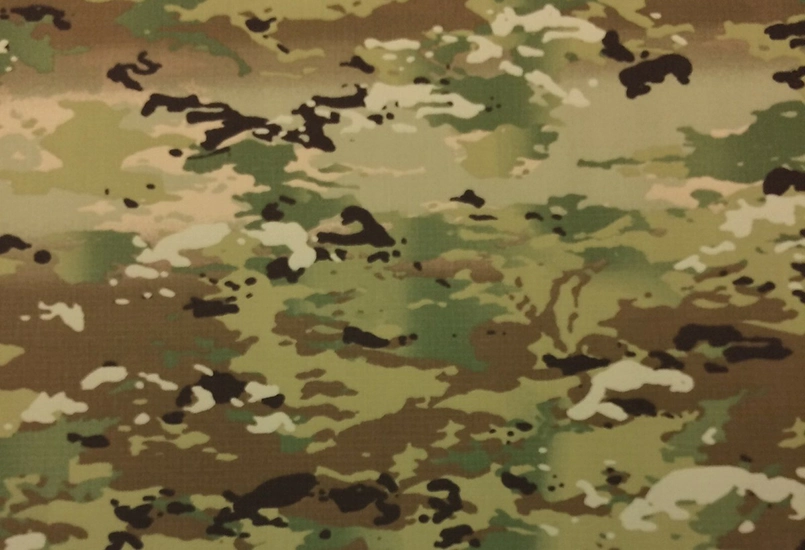
If your goal is a practical, affordable, and easily sourced solution that works under the 10m rule, Multicam is perfectly acceptable.
This may also be referred to as MTP (Multi-Terrain Pattern). For the purposes of this guide, Multicam is the general term.
At distance or at night, Multicam delivers the right overall colour breakup and silhouette once armour and props are added. It is not screen-accurate, but it works.
This was the route used for the Gunman Airsoft Halloween Special night game, where a 5 man squad of US Colonial Marines needed to be kitted quickly and consistently.
This USCM camo pattern is applied to US Colonial Marine body armour only and is usually a hand-painted pattern. It is not the same as the uniform camo.
This camo is a hand-painted pattern on:
Using this armour camo as a cloth uniform pattern would be incorrect for a movie-accurate build. There are "US Colonial Camo" clothes such as tracksuits that use this pattern, but they are not screen-accurate and not appropriate for a USCM loadout.
Once the distinction between uniform camo and armour camo is understood, the rest of the loadout becomes much easier to get right.
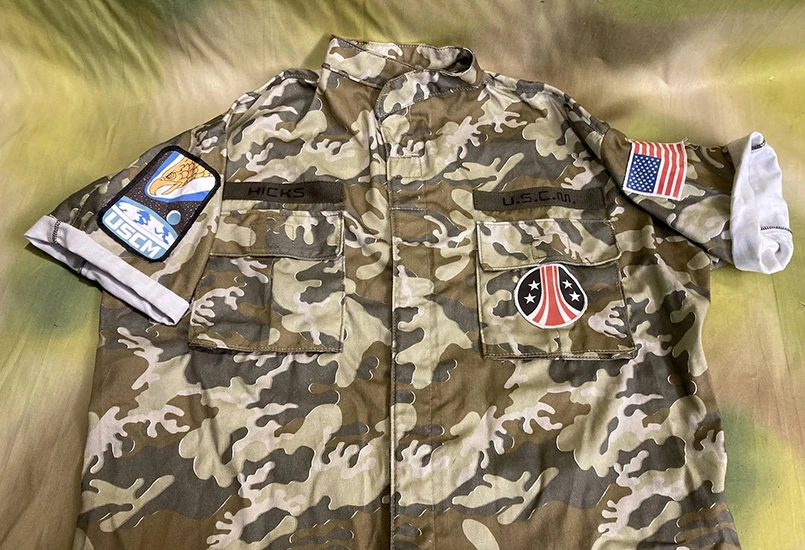
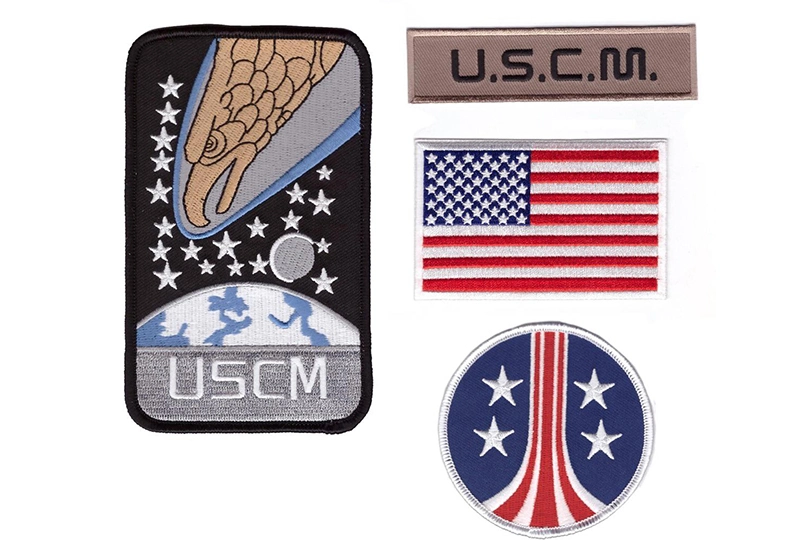
Each US Colonial Marine wears patches on their shirts. Whilst these are completely optional, especially when applying the 10m rule, they greatly raise a level of authenticity of the loadout.
The key patches are:
The 125mm x 75mm embroidered patch of the USCM Diving eagle patch is worn on the right upper sleeve.
The 80mm x 50mm embroidered patch of the USA Stars and Stripes patch is worn on the left upper sleeve. There are commonly yellow border versions available, but the white border version is movie accurate.
The 75mm round embroidered patch of the USCM Stars and Bars patch is worn on the left breast pocket.
The 100mm x 25mm brown embroidered "U.S.C.M" Unit patch is worn above the left breast pocket.
The 100mm x 25mm brown embroidered name patch is worn above the right breast pocket. This would have to be custom made.
Most of the patches can be purchased from eBay or Amazon, but the name patch is the only one that may need to be custom made. The typeface used for the U.S.C.M and name patch is called Nasalization.
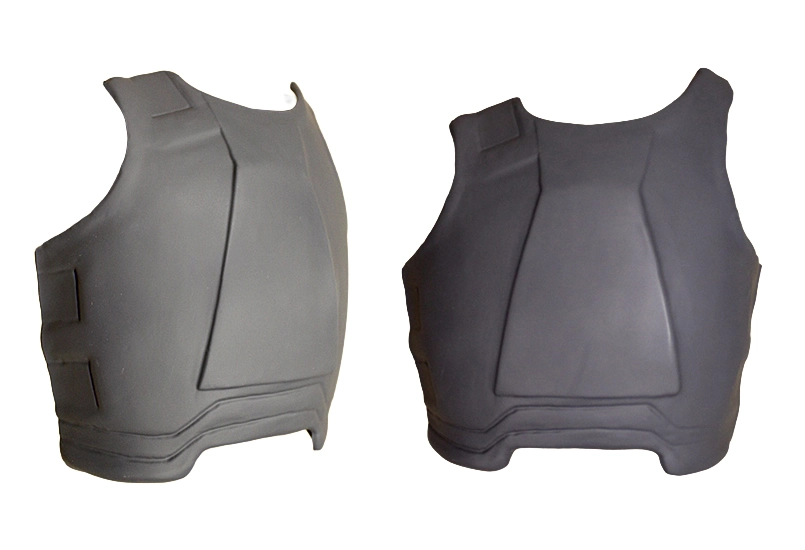
The body armour is one of the most visually important parts of the US Colonial Marine loadout. It defines the silhouette and does a lot of the heavy lifting when it comes to instantly reading as “Aliens”.
When people think of Colonial Marine armour, they are usually thinking of the chest plate, back plate, shoulder armour, groin plate and leg braces. The helmet is part of the overall armour system, but it is covered separately.
There are three practical routes you can take for body armour, depending on your goals, budget, and available time.
This is the most common approach for cosplay builds and for good reason.
Using EVA foam templates, you can create a full set of USCM body armour that is lightweight, flexible, and comfortable to wear for long periods. The armour is typically built in sections and layered to recreate the raised details and recessed lines seen in the film.
There are several well-established templates available from makers who have already done the hard work of patterning and testing. SKS Props has a free PDF template available and these are worth using rather than trying to design everything from scratch.
EVA foam armour is:
The main downside is time. Cutting, shaping, gluing, sealing, and painting EVA foam armour takes patience, especially if you want a clean finish.
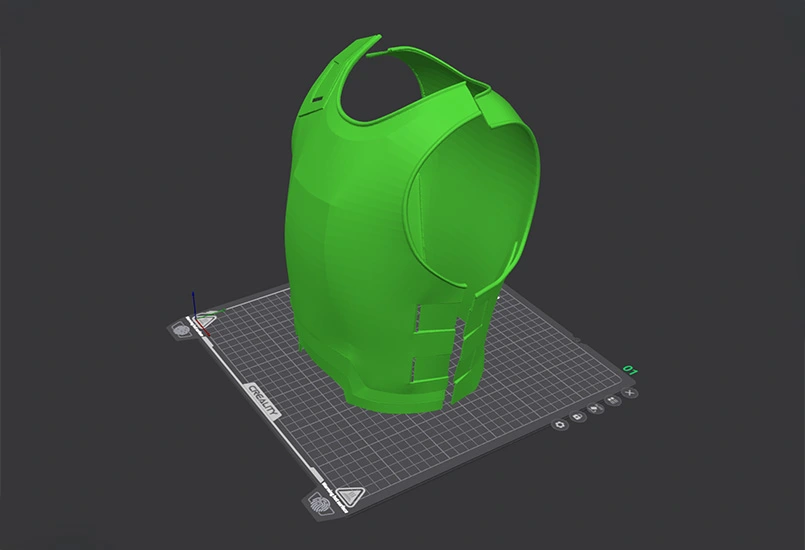
3D printing the armour is another viable route, particularly if you already have access to a printer and are comfortable with post-processing.
Armour pieces are typically printed as separate sections and then assembled. Material choice matters here. PLA can work, but it is best suited to display pieces or light wear. PETG or ABS are more durable, but require a printer capable of handling these materials reliably.
3D printed armour allows for:
The trade-off is weight and post-processing. Large armour prints take time, use a lot of material, and require sanding, filling, and painting to remove layer lines. Comfort also needs to be considered, as rigid plastic against the body can become uncomfortable without padding.
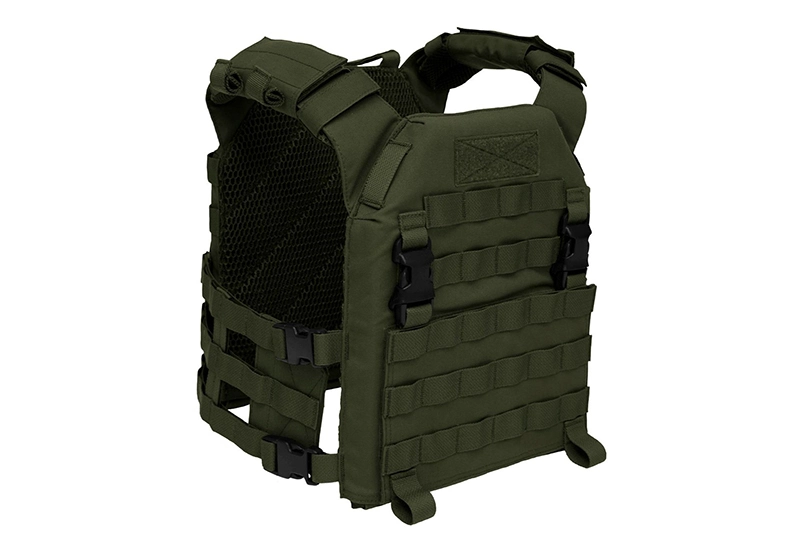
For practical builds, especially for airsoft or one-off events, a modern plate carrier can be used as a stand-in for body armour.
For the Gunman Airsoft Halloween Special game, this is the route that was taken.
A plain olive drab or dark green plate carrier, with all patches removed, delivers the right bulk and silhouette at distance. Once the shoulder lamp, helmet, and weapons are added, it reads convincingly as USCM armour from 10 metres away.
This approach has several advantages:
It is not screen-accurate, but it is effective and practical.
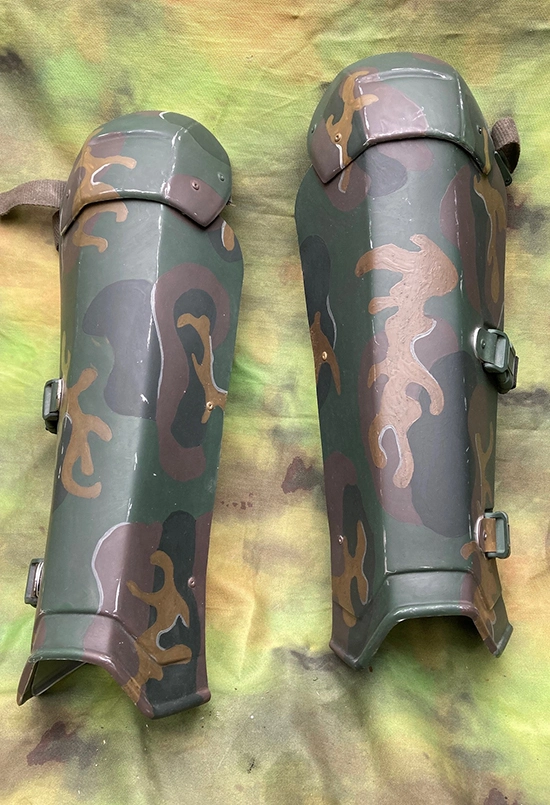
Regardless of which route you take, the armour should be finished using the US Colonial Marine body armour camo, not the uniform camo. see the uniform and camouflage section for details.
This is a hand-painted pattern applied to the armour plates and helmet. It is visually distinct and should not be confused with the cloth uniform camouflage.
Weathering is important. Clean armour looks wrong. Scratches, scuffs, dirt, and wear bring the armour to life and help sell the realism.
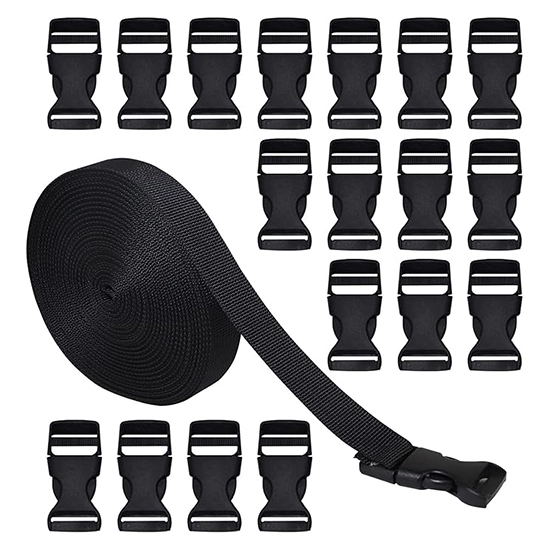
The EVA Foam and 3D printed armour variants need to be held together with webbing straps and mounting hardware.
Comfort also matters. Padding on contact points, especially around the shoulders and neck, makes a big difference if you plan to wear the armour for a long period of time.
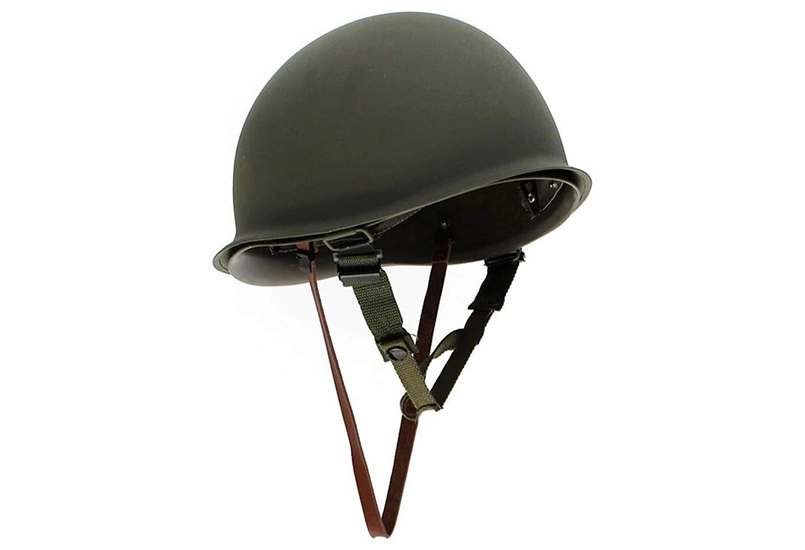
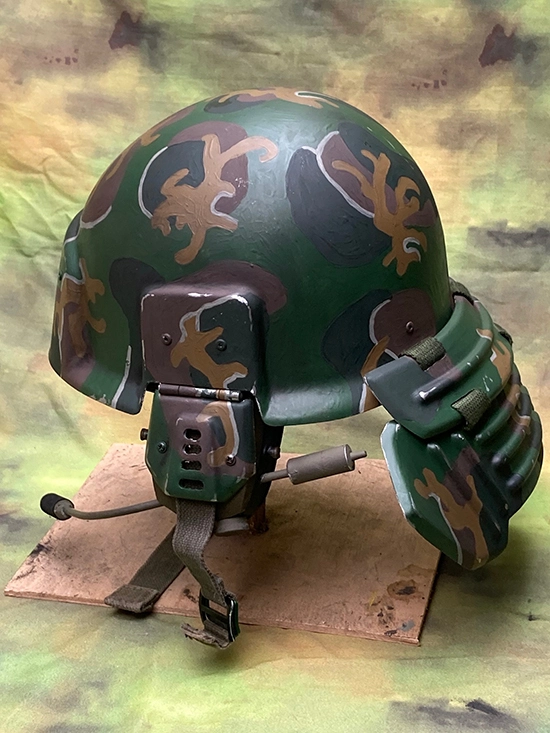
The US Colonial Marine helmet is one of the strongest visual identifiers in the entire loadout. From a distance it instantly signals “Aliens”, and once it is on your head, most of the rest of the costume falls into place.
The helmet is based on a Vietnam-era M1 steel pot helmet, modified with a small number of very specific additions. There are two practical routes you can take for the base helmet, and both can work equally well if finished correctly.
The first route is to use an original or reproduction Vietnam M1 steel helmet. This has the advantage of weight and presence. It feels like a real piece of kit, and once modified, it sits very convincingly as a Colonial Marine helmet.
Real Steel M1 Helmet
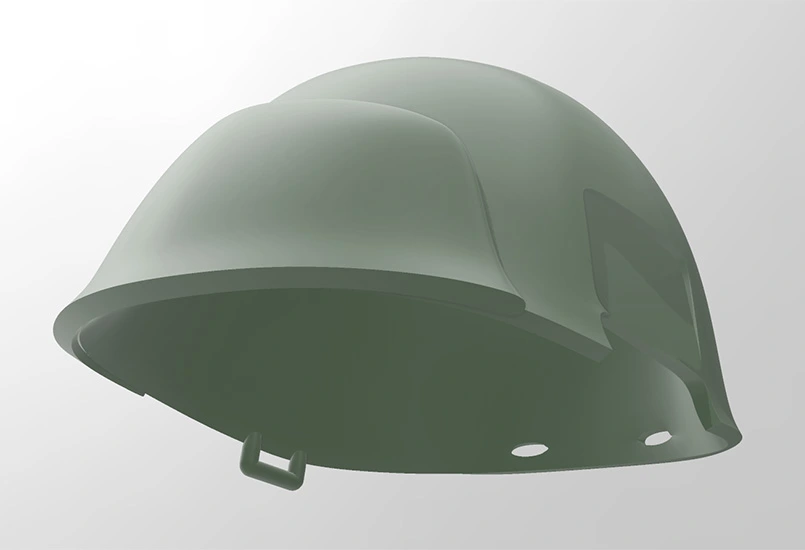
The second route is to use a 3D printed helmet. This avoids permanently modifying a real steel shell and makes adding details far easier. It is also significantly lighter, which matters if you plan to wear it for long periods.
3D Printed Helmet
Whichever route you choose, the original helmet suspension is not great by modern standards. A modern plastic helmet liner is an easy upgrade and makes a big difference to comfort and fit. M1-style liners can be used in both steel and 3D printed helmets.
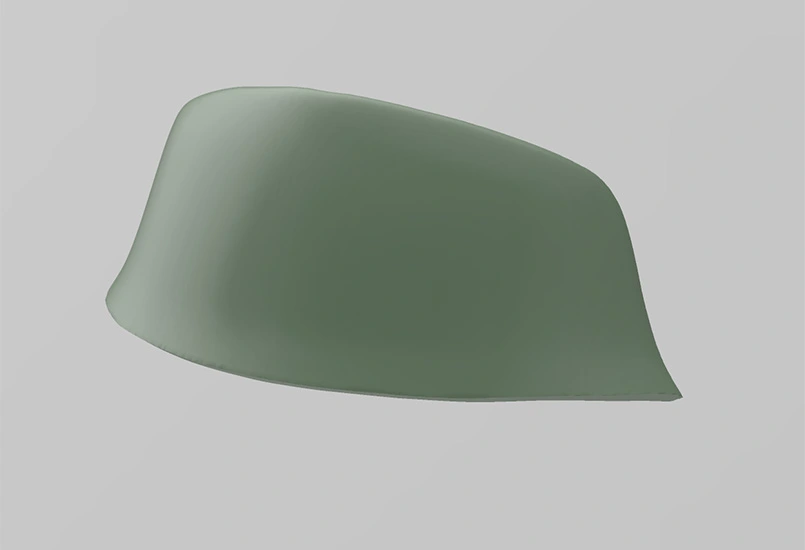
The front bump is a simple detail and has a intentional disproportionate effect on the helmet profile. Without it, the helmet will never quite look right.
This is best handled as a separate printed part rather than something moulded into the helmet shell. Print it, clean it up, and attach it to the front of the helmet. This works equally well on steel and printed helmets and is one of the easiest wins in the entire build.
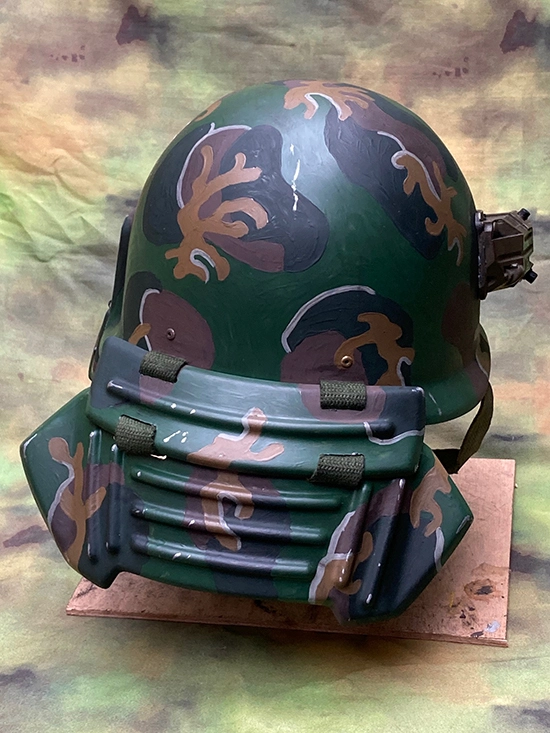
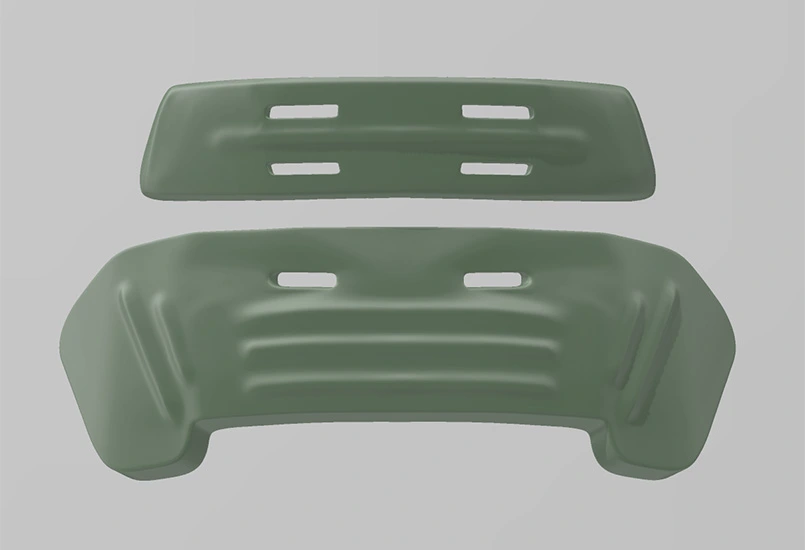
The lobster plates sit at the back of the helmet and protect the neck. They are also one of the most recognisable USCM helmet features.
These are made up of two plates linked together with webbing so they can flex and move with your head. 3D printing works well here and keeps things simple.
One small comfort improvement that is worth doing is adding a thin layer ofEVA foam backing to the plates. This stops hard plastic knocking against the back of your neck and makes the helmet much more wearable during longer sessions.
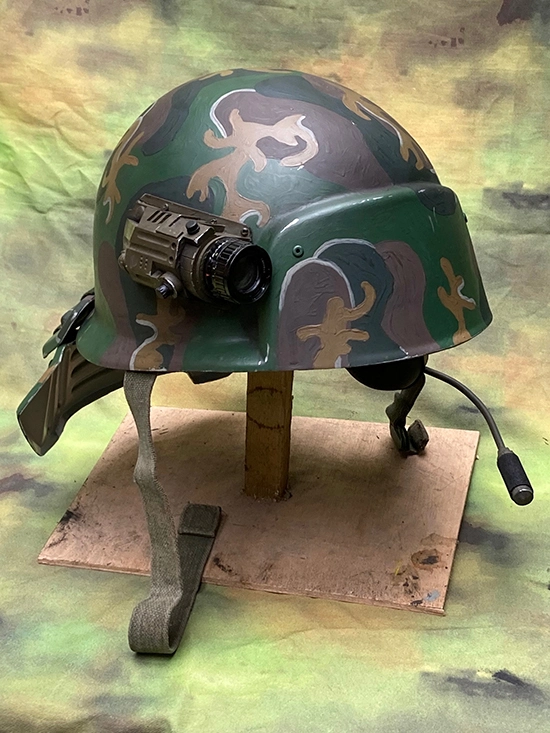
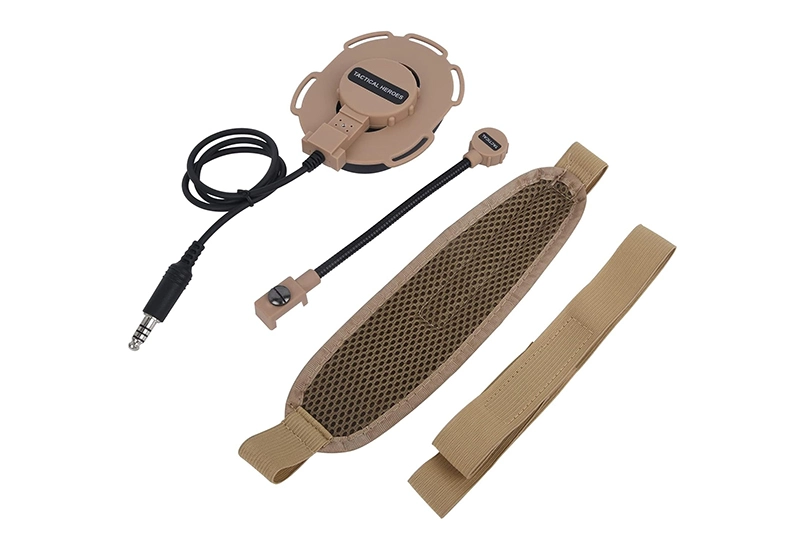
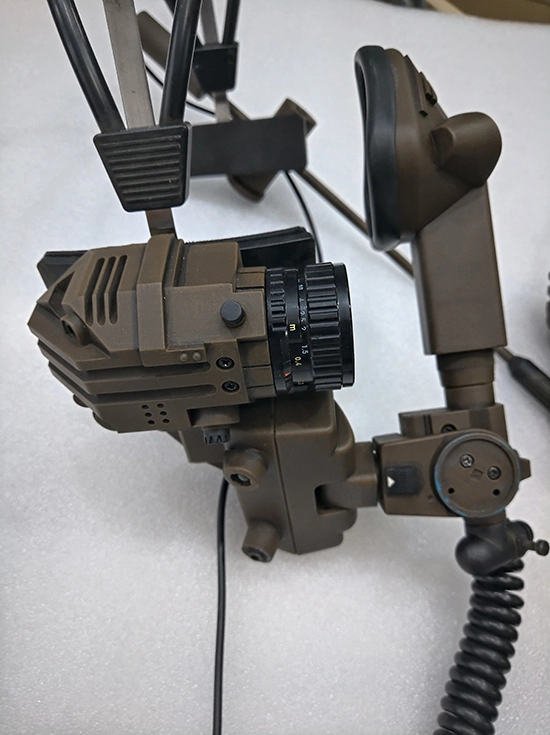
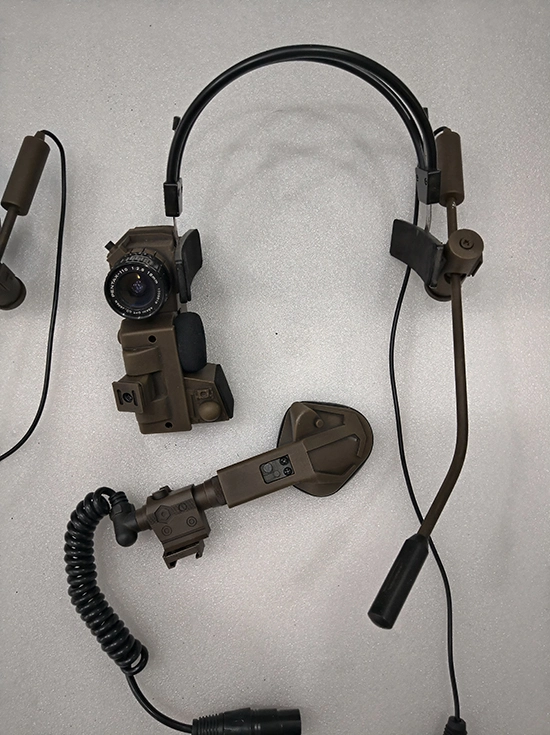
Mounted on the left-hand side of the helmet is the communications unit. This is where build decisions become more permanent if you are working with a steel helmet.
On a real M1 helmet, the rim sits low over the ear. To get the comms unit to sit correctly, a section of the helmet needs to be cut away. Once you do this, there is no going back. This is one of the reasons a 3D printed helmet is appealing if you want working comms without cutting metal.
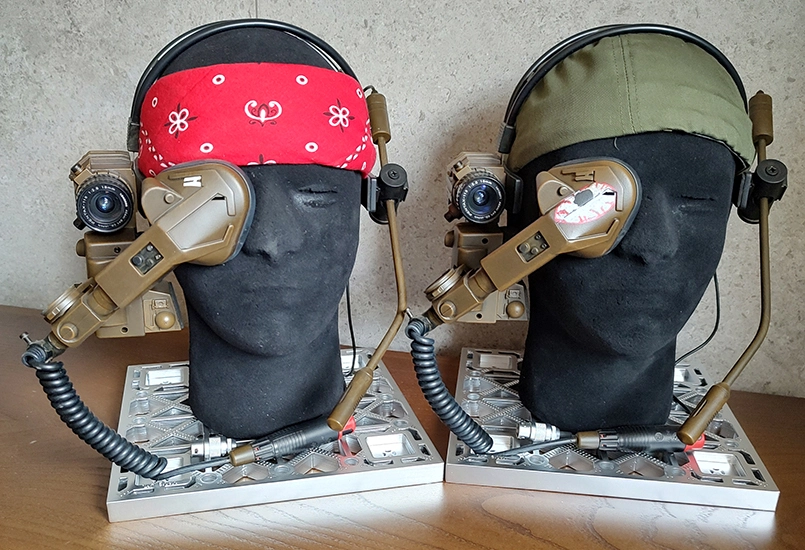
For my build, the comms unit is fully functional rather than a dummy block. A Bowman-style single-ear headset was stripped down to just the speaker, boom mic, and cable, and then housed inside a modified comms shell. This connects to a Baofeng radio via a Kenwood 2-pin connector, allowing real communication during games.
If you only want the look, this can remain a non-functioning printed part. If you want it to work, the Bowman route is cheap, reliable, and actually works.
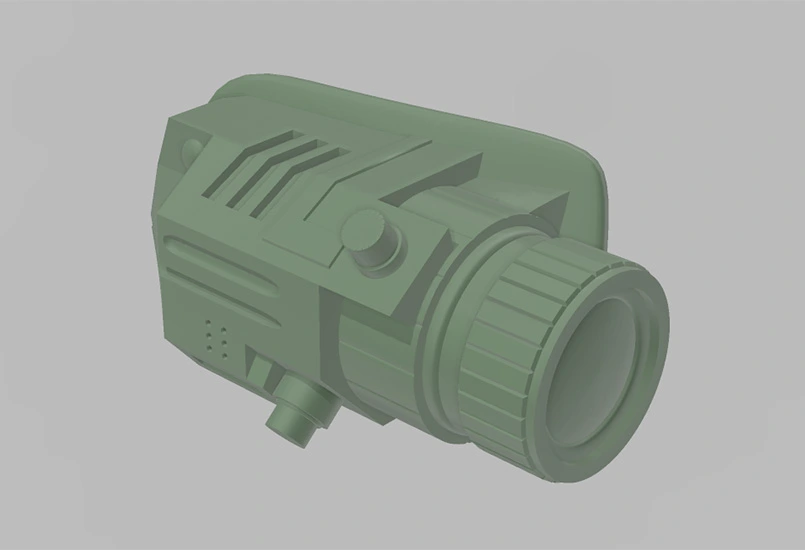
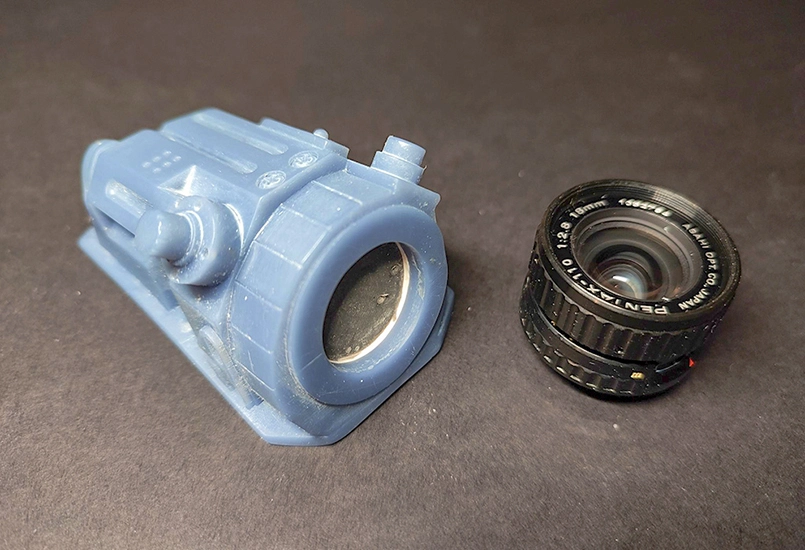
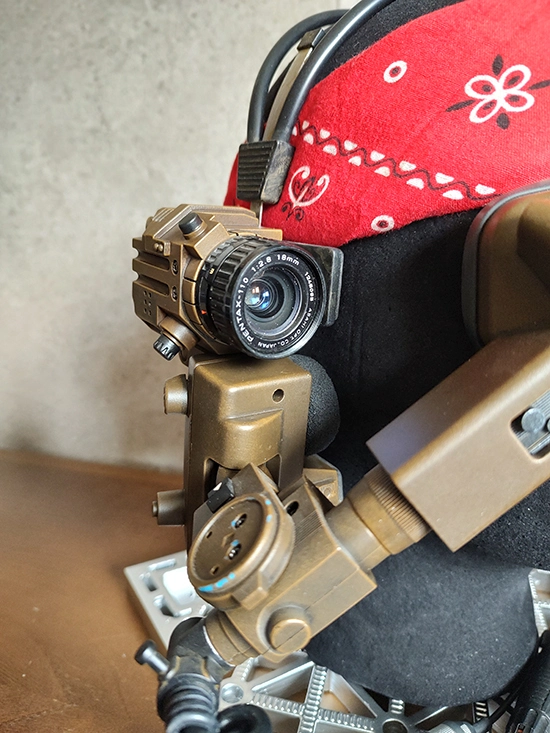
On the right-hand side of the helmet is the helmet camera. Even as a non-functioning prop, this detail adds a lot to the overall look and reads clearly from a distance.
The simplest approach is to 3D print the camera body and mount it securely to the helmet. Screwing it in from the inside is more durable than glue, especially if the helmet will see outdoor use.
For closer inspection, the front of the camera can be finished with a lens. The film-used lens was a Pentax Auto 110, but for practical builds a clear acrylic disc gives the same visual effect without risking real glass being damaged.
A fully functioning helmet camera is on my upcoming project list, with the aim of streaming a live feed back to a control station. The dummy camera gives you the look; the working version is a future upgrade.
The helmet should be painted using the same US Colonial Marine body armour camouflage, not the uniform camo. This is a hand-painted pattern and should visually match the chest, back, and shoulder armour.
Weathering matters here. A clean helmet looks like a costume. Scratches, scuffs, dirt, and general wear help the helmet sit naturally with the rest of the kit and stop it looking like a newly painted prop.
If you are painting the full armour set, it is worth painting the helmet at the same time so the colours and wear levels match across the entire build.
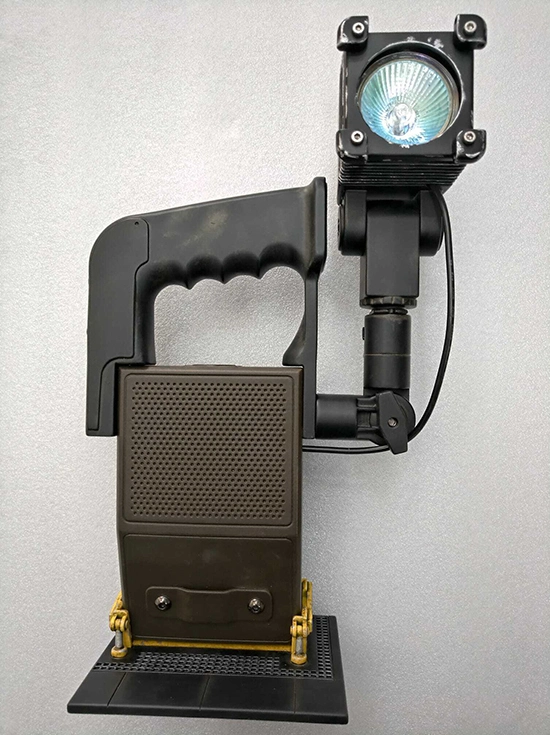
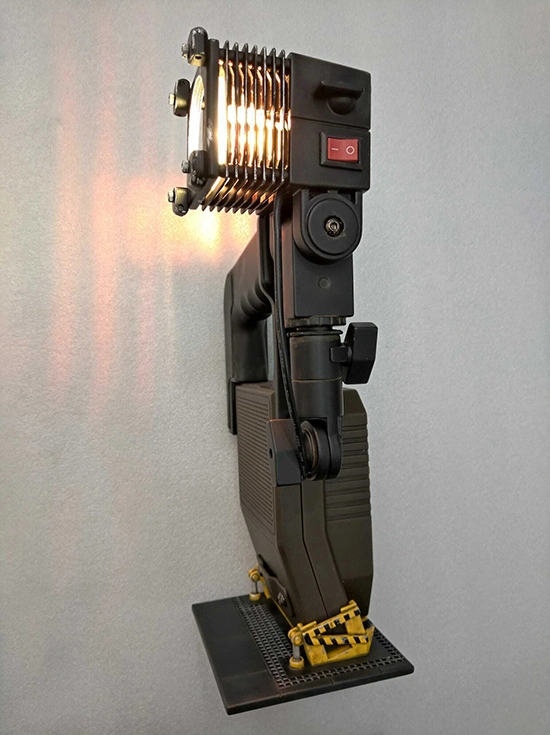
The shoulder lamp is another distinctive part of the US Colonial Marine loadout. It further pushes the silhouette to the recognisable US Colonial Marine.
This is not a component with multiple build philosophies or accuracy debates. You either make one, or you buy one from another maker. Either way, it is worth having.
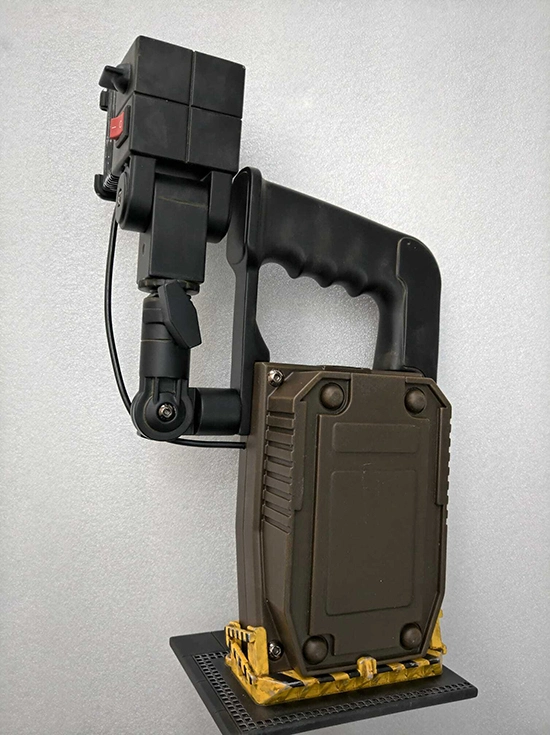
The lamp consists of two main parts: the lamp head itself and the rear housing that contains the power source. These are connected by a short arm that mounts the lamp above the shoulder.
The lamp body is hollow, which allows space for a small rechargeable battery pack. Inside the lamp head is a 12-volt LED ceiling light typically used in caravans. These are bright, reliable, and do not generate the a lot of heat like the halogen bulbs, although halogen bulbs were used in the Aliens movie.
A simple inline switch is all that is needed to control the lamp. Once assembled, the lamp is very brightand effective for navigating your way around in the dark.
The one structural weak point to be aware of is the arm that connects the lamp head to the rear housing. Early versions printed in PLA failed repeatedly at the 90-degree joint when worn through woodland and scrub. Reprinting this part in PETG or reinforcing it mechanically solves the problem.
Mounting the lamp depends on what you are wearing underneath.
Once mounted, the lamp sits high and proud, exactly where it should. Combined with the helmet and armour, it does a huge amount of visual work for very little complexity.
The paint job for the solder lamp uses just two colours. Army brown for the battery box. Matt black for the handle, 90° arm and bulb. Painting the shoulder lamp in the body armour camo colours would be incorrect. Weathering should match the rest of the armour as clean lamps look wrong. A few scuffs, scratches, and general wear helps it blend into the rest of the kit
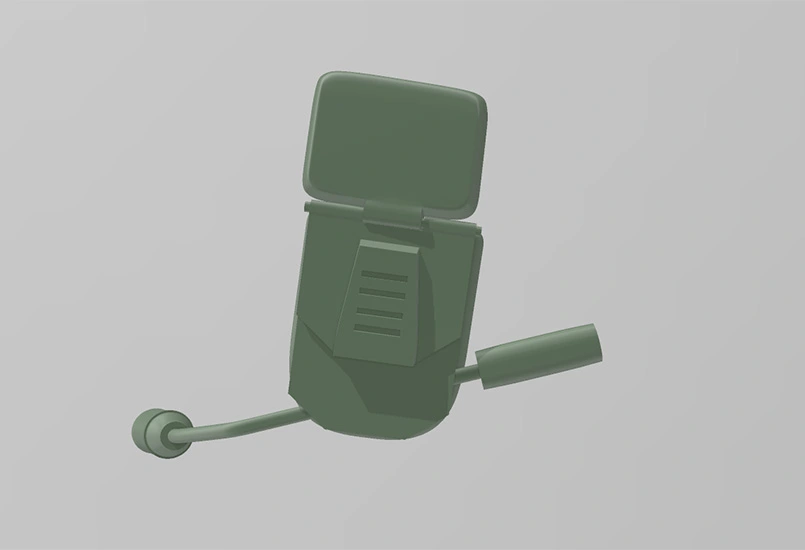
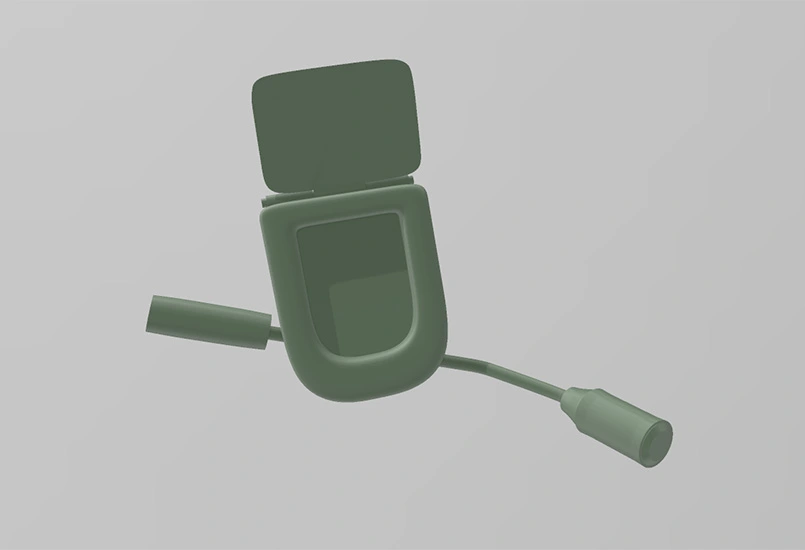
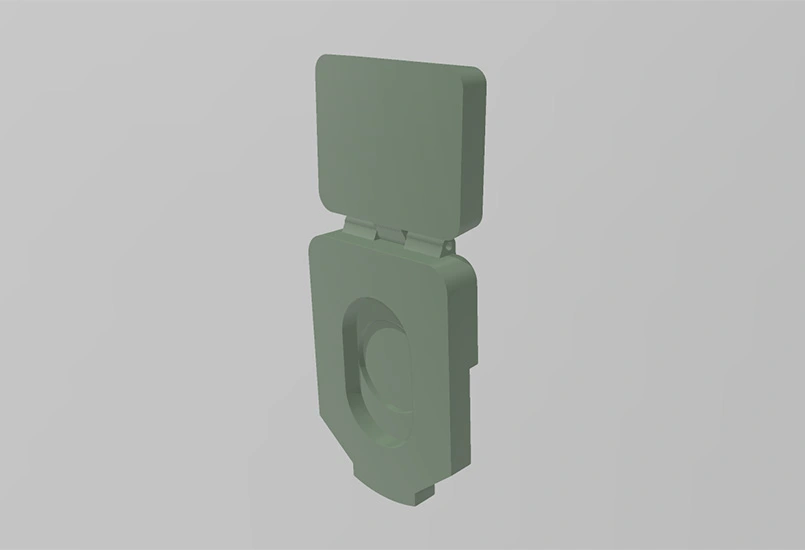
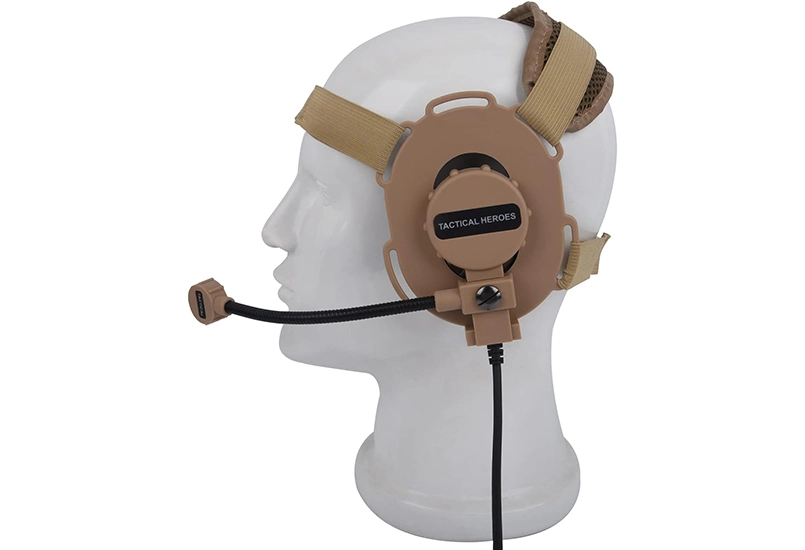
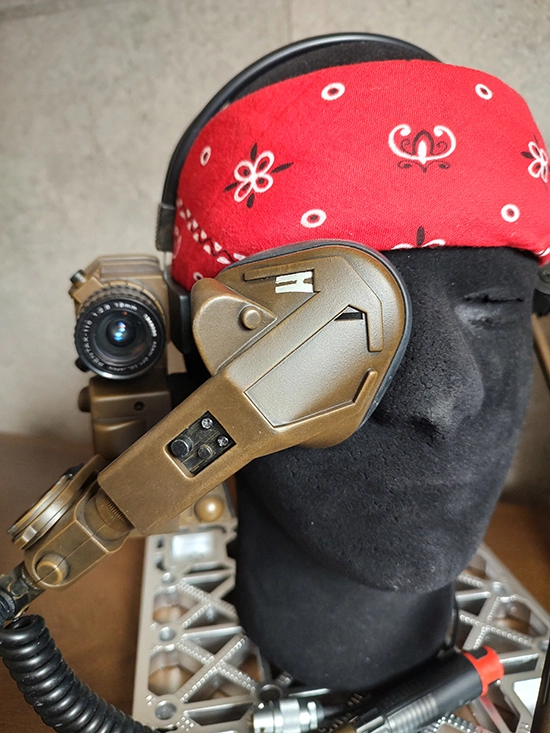
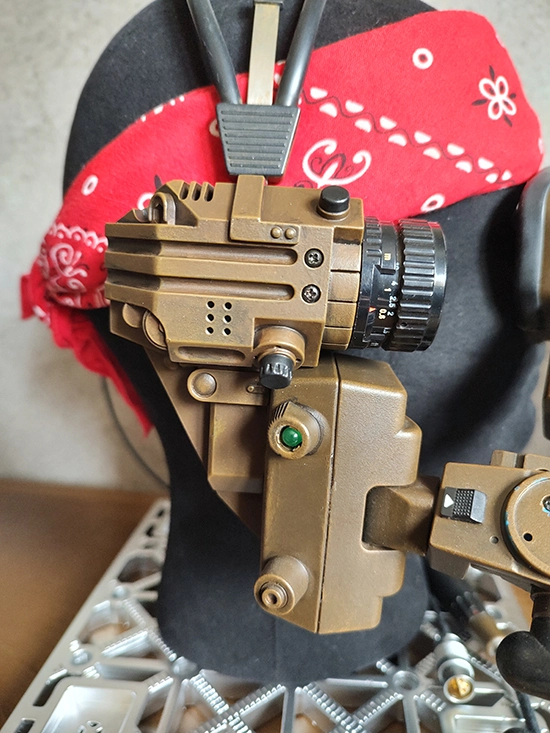
The Smartgun headset is specific to the M56 Smartgunner role and is not worn by standard grunts or Hicks-style loadouts.
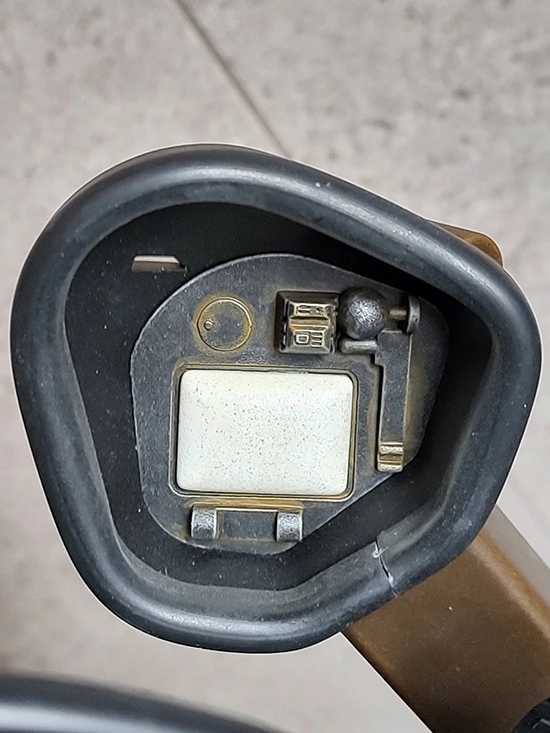
Instead of a helmet, the Smartgunner wears a headset with an eye-mounted viewfinder. This is one of the details that immediately separates the Smartgunner from the rest of the squad.
The simplest and most practical approach is to 3D print the headset using an available model. These typically include the eyepiece housing and the side-mounted electronics block as a single assembly.
For wearability, the headset can be mounted using elasticated webbing to form a headband. This keeps the headset lightweight, adjustable, and comfortable enough to wear for extended periods without needing a rigid helmet or frame.
The headset can remain a non-functioning prop without harming the overall look. From a distance, the eyepiece and side profile are doing the visual work.
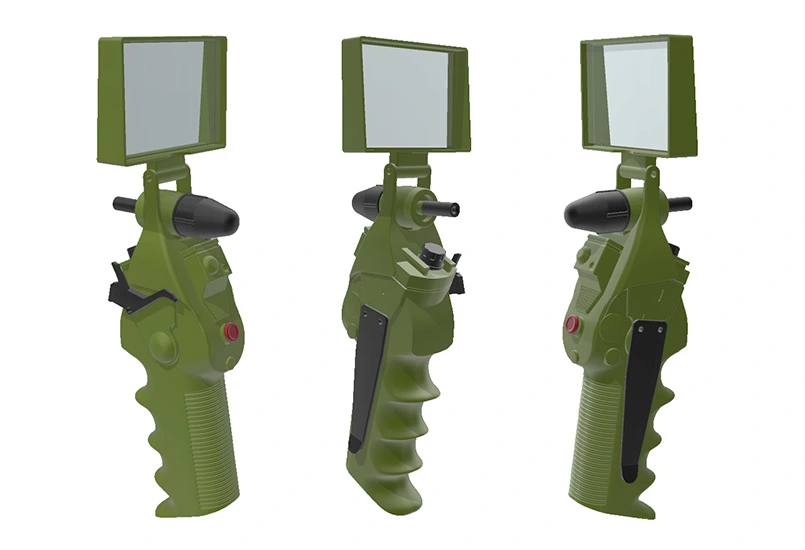
The motion tracker is an optional accessory, but it is certainly a very cool accessory to have. Especially a functional one with screen, sounds and the tension of Xenomorphs closing in on your position.
Used by Hudson and Hicks (and Ripley)in the film, even when carried passively, the Motion Tracker adds a huge amount of authenticity to the overall look.
There are two commonly recognised versions of the motion tracker. The first is the original Hicks / Ripley unit seen in the film Aliens. The second is the later redesign introduced in the Alien: Isolation video game. Both read clearly as USCM equipment, but the film version is the most iconic.
For this loadout, the original Hicks-style motion tracker was used.
The tracker can exist purely as a visual prop, and many builds stop there. However, the motion tracker lends itself extremely well to being made functional.
If you want to build your own, or understand what is involved in making a functional tracker, the full project can be found here: Aliens Motion Tracker
If you choose not to build one yourself, the motion tracker still works well as a static prop. From a distance, the shape and screen placement are enough to sell the idea, especially when paired with the correct loadout.
Whether functional or not, it is one of those accessories that elevates a USCM build from “looks right” to “feels right”.
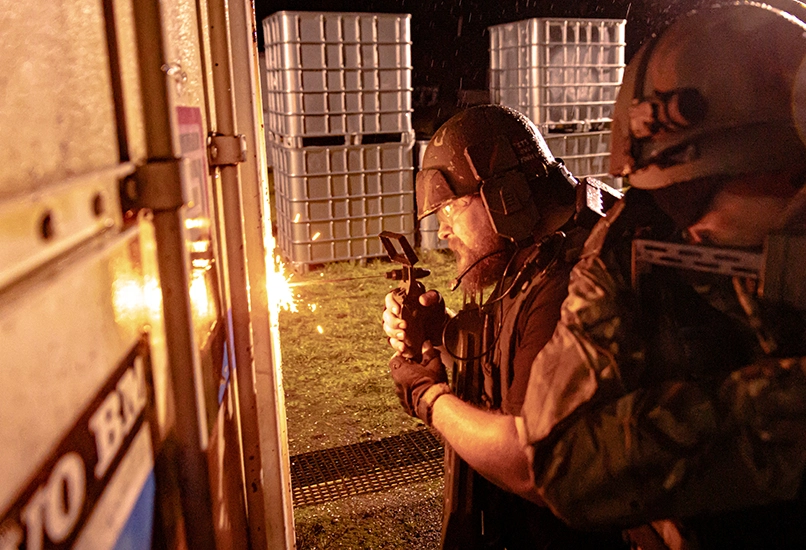
The welder is another optional piece of USCM kit, but it fits naturally into the Aliens setting and works well as a carried prop.
In the film it is used during the scene where Vasquez welds a door shut, and it has since become a familiar background tool associated with the Colonial Marines rather than a primary piece of equipment.
The welder can be built purely as a visual prop, but it also lends itself well to being made functional in a safe, controlled way.
For this loadout, the welder was built using a 3D printed shell and adapted to accept a standard handheld firework sparkler. When lit, the sparkler creates a convincing welding effect without introducing heat, flames, or complexity beyond what is appropriate for events.
The full build, including how the sparkler is mounted and safely contained, is documented separately: Aliens ME3 Welder
Regardless of whether you choose not to build one yourself or not, the welder is cool, but optional and complements the loadout rather than defining it.
The weapons are where the US Colonial Marine loadout starts to diverge depending on whether you are an Airsofter or a Cosplayer. The visual it's the same, but the paths available are different.
If you are an Airsofter with a valid defence such as UKARA in the UK, then a number of screen accurate weapons can be purchased off the shelf. If you are not, those same weapons become build projects or static props.
This section covers the weapons used by the US Colonial Marines, how they can be approached for the loadout, and where the practical trade-offs sit.
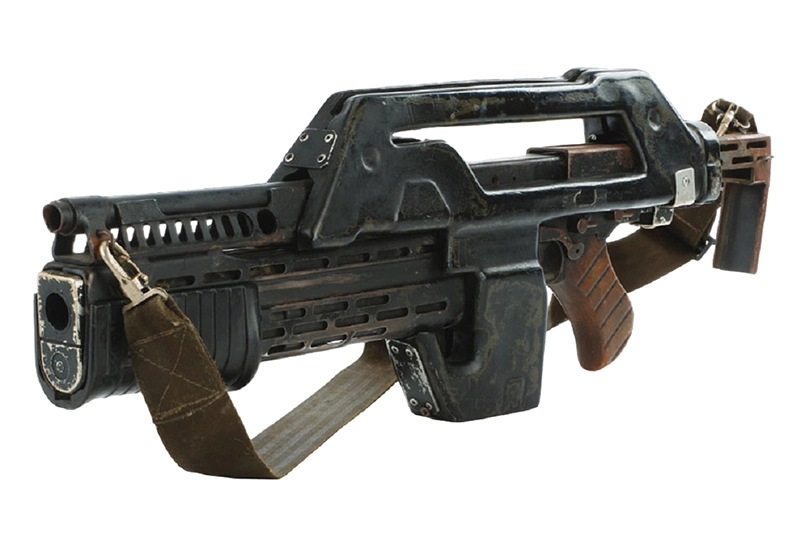
The M41A pulse rifle is the standard issue primary weapon of the US Colonial Marines and is carried by your typical USCM grunt.
For airsofters, this is one of the few weapons in the Aliens universe that can be purchased as a ready-made airsoft replica. These are based on a airsoft Thompson M1A1 donor gun, mirroring how the film weapons were originally constructed.
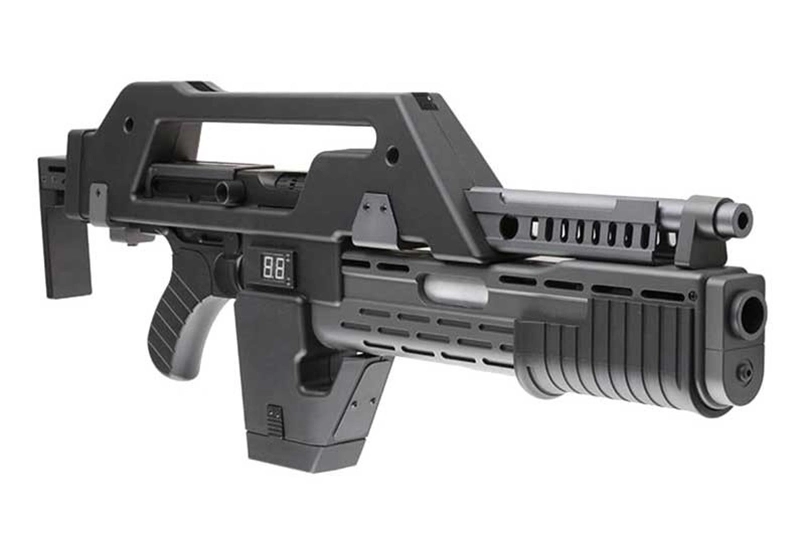
Off-the-shelf airsoft pulse rifles made by Snow Wolf are available in several finishes. Black or Olive drab are the closest matches for a USCM loadout. These replicas include the retractable stock, dummy underslung grenade launcher, and the distinctive 99 two-digit ammo counter that resets on magazine changes.
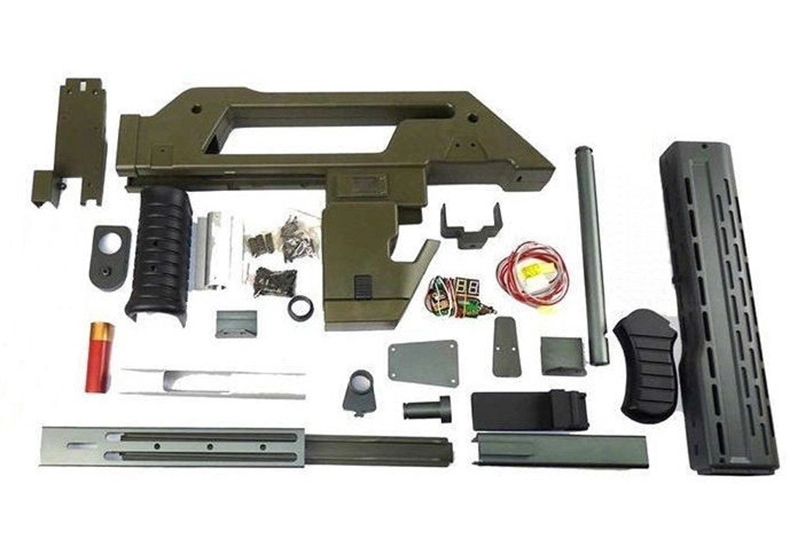
An variation of this is to buy a Snow Wolf pulse rifle body kit and fit it over an existing M1A1 Thompson airsoft gun (Snow Wolf, CYMA or Tokyo Marui). This achieves the exact same end result, including two digit ammo counter, and is useful if you already own a compatible donor weapon.
Note that the correct magazines are the M1A1 Thompson short magazines. The longer version of the magazines will function, with a magaizne mag cover modification, but break the silhouette.
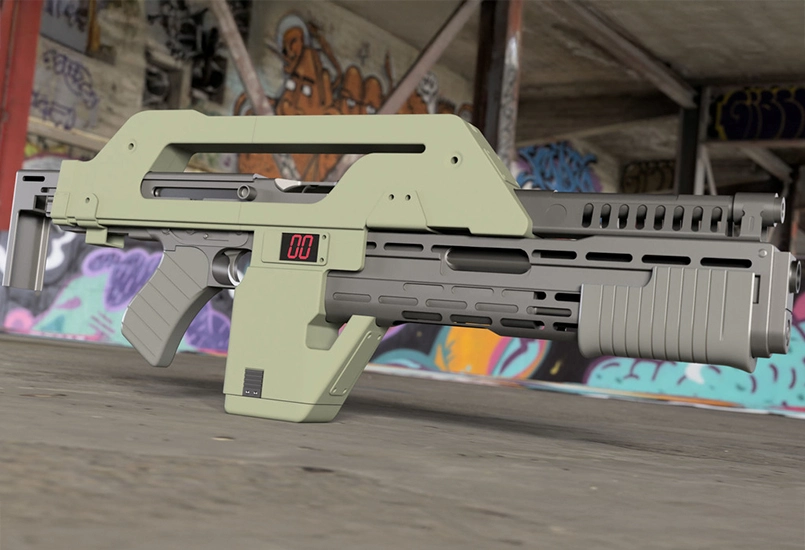
If you are not an airsofter, the pulse rifle becomes a prop build. This usually means sourcing an STL and 3D printing the weapon. This route is cheaper in terms of cash outlay but significantly heavier on time and post-processing. Layer lines, structural strength, and moving parts all need to be considered.
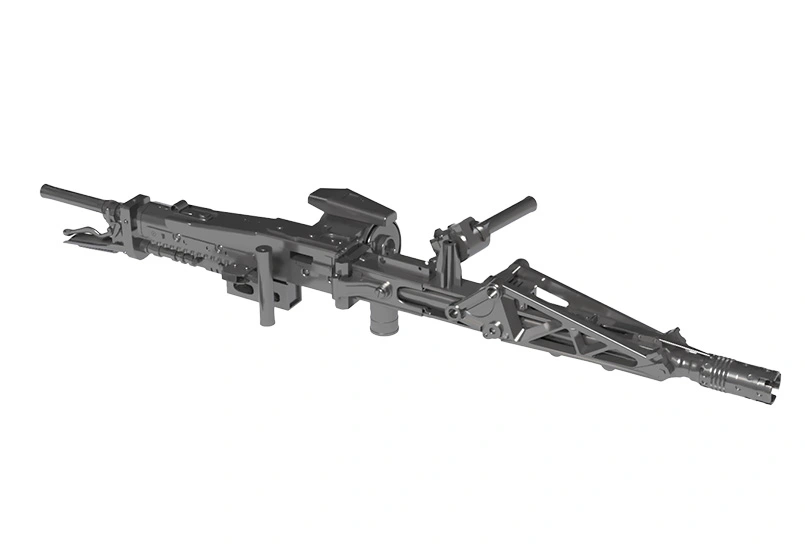
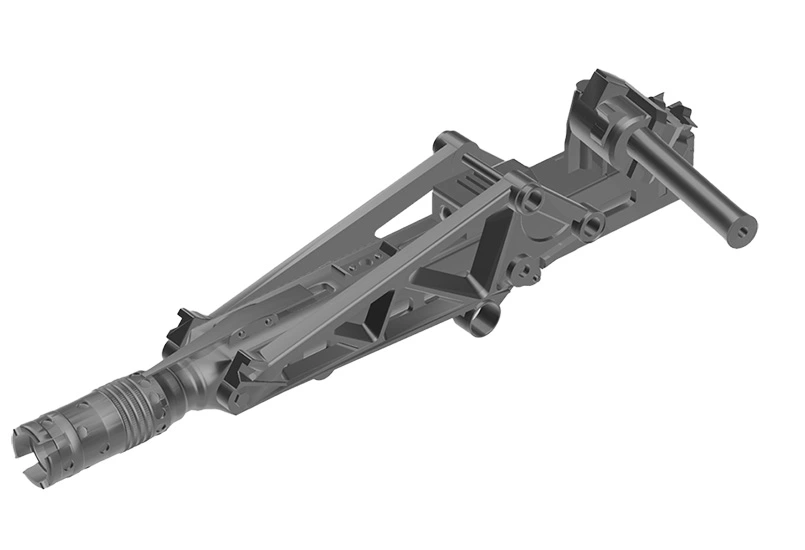
The M56 Smartgun is only carried by the Smartgunner (Vasquez and Drake) and immediately sets that role apart from the rest of the squad.
In the film, the Smartgun was built around an MG42 machine gun. The same approach can be taken today using an airsoft MG42 as a donor weapon if you are an airsofter.
For my own loadout, the Smartgun was treated as a full project in its own right. The donor gun, printed components, and real-world hardware are combined and mounted to an articulated support arm rather than being carried by hand.
The full Smartgun build, including the mounting system and donor weapon, is documented separately and goes into far more detail than would make sense to include here: Alien M56 Smartgun Project.
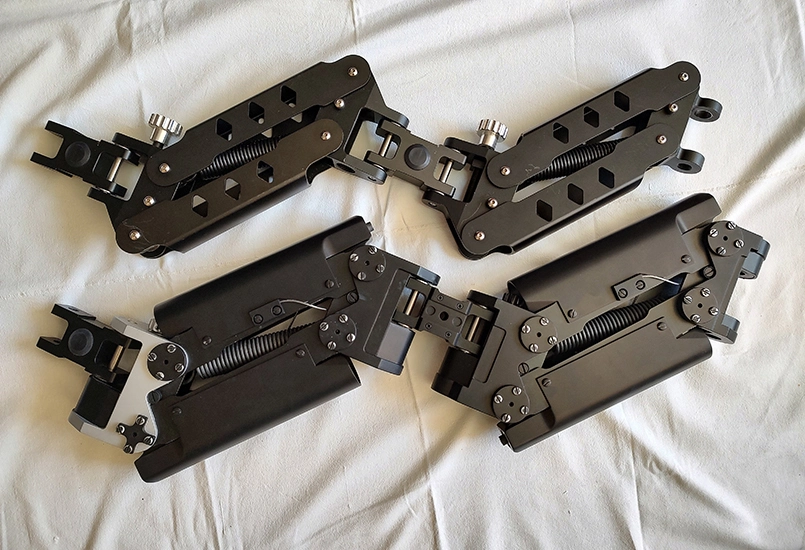
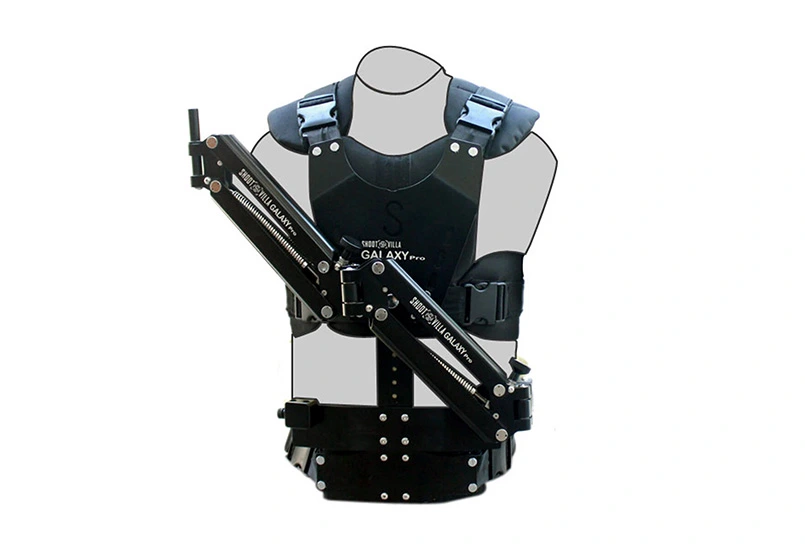
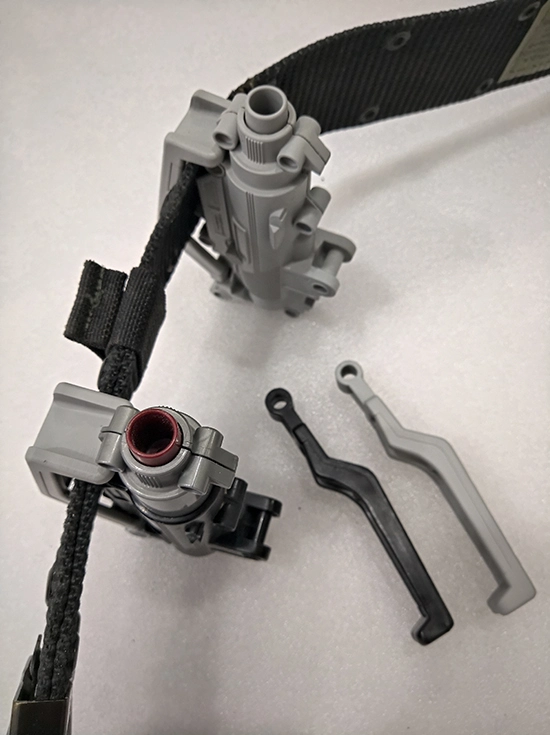
The other part of the Smartgun build is how you carry it. In the film it is supported by an articulated arm mounted to a body vest, called a Steadicam rig. A real Steadicam is expensive because it is designed for professional film equipment, but you do not need a genuine one to achieve the same practical outcome.
For my build I used a much cheaper Steadicam-style rig sourced via eBay. It cost around £180 rather than the £3,000+ you would be looking at for a genuine Steadicam. It does the job, carries the weight, and from 10 metres away it reads correctly as the Smartgun support system.
If you are not an airsofter, the Smartgun itself becomes a large-scale prop build. STL models do exist, but the size, weight, and assembly effort should not be underestimated. Even as a static prop, it is a commitment.
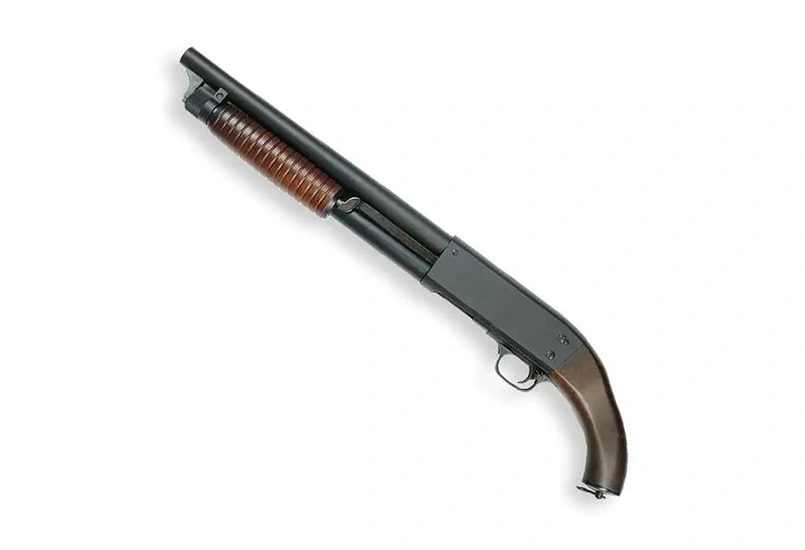
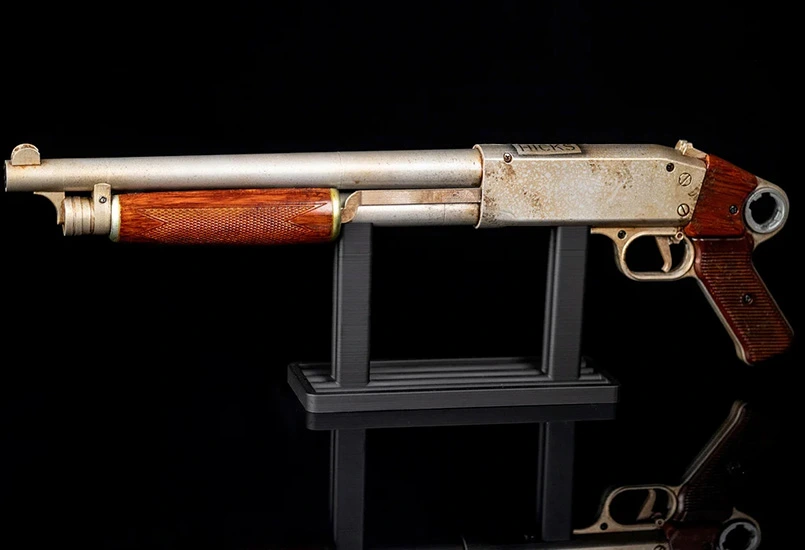
The short shotgun is most closely associated with Hicks and is typically carried in addition to the pulse rifle.
The film weapon was based on a cut-down Ithaca 37. The airsoft version does exist, but availability is sparse and stock is often simply "Out of Stock".
From a visual standpoint, any short pump-action shotgun is sufficient under the 10m rule. Exact model accuracy matters far less than overall proportions and how it is carried.
For non-airsoft builds, a printed or dummy shotgun works just as well and avoids the availability issues entirely.
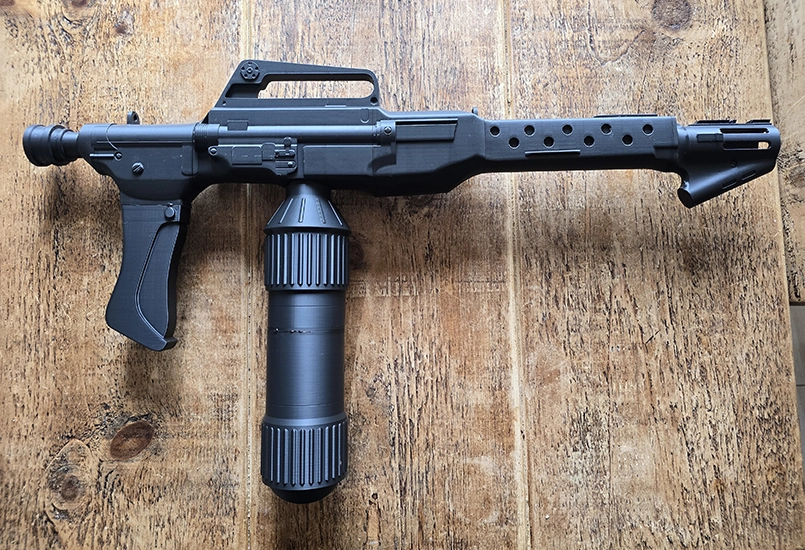
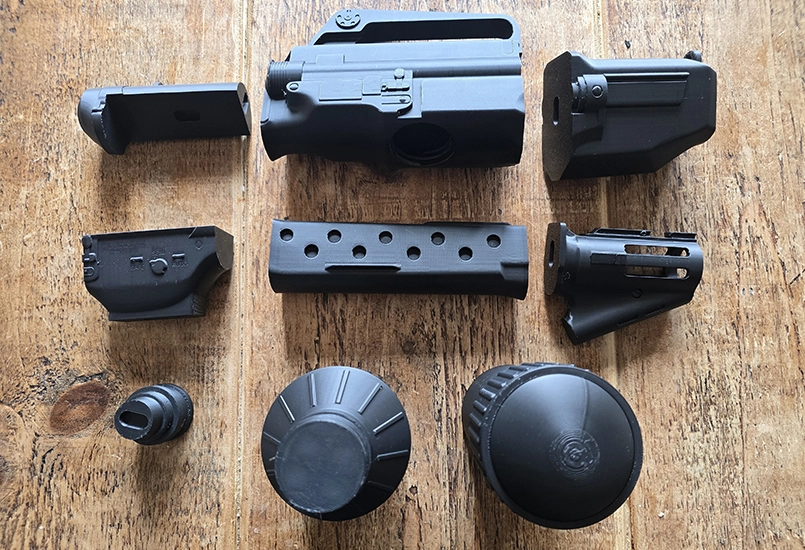
The M240 flamethrower is an optional weapon seen in Aliens, and it is usually carried as an alternative to a pulse rifle rather than alongside it. Having said that, Ripley duct-tapes a M240 flamethrower and M41A pulse rifle together in the film.
If you want one for a loadout, the only realistic route is to treat it as a prop build using an STL model and 3D print it.
In the film, the flamethrower was built around an M16 base with an M203 handguard. For most builds, getting the overall proportions right matters more than chasing donor-part accuracy.
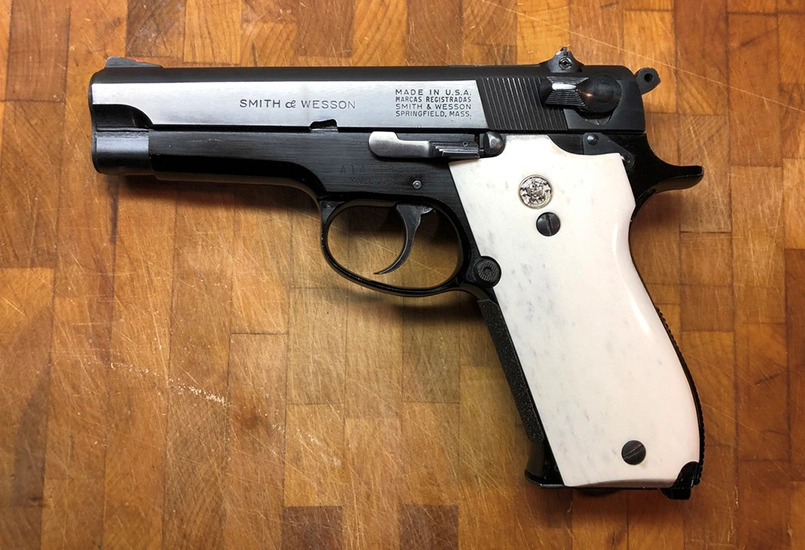
Smartgunners can carry an optional chest holstered Smith & Wesson Model 39.
Airsoft versions of this pistol are very difficult to source, let alone a screen-accurate replicas which are rarer still. For most builds, this remains a very optional detail rather than a requirement.
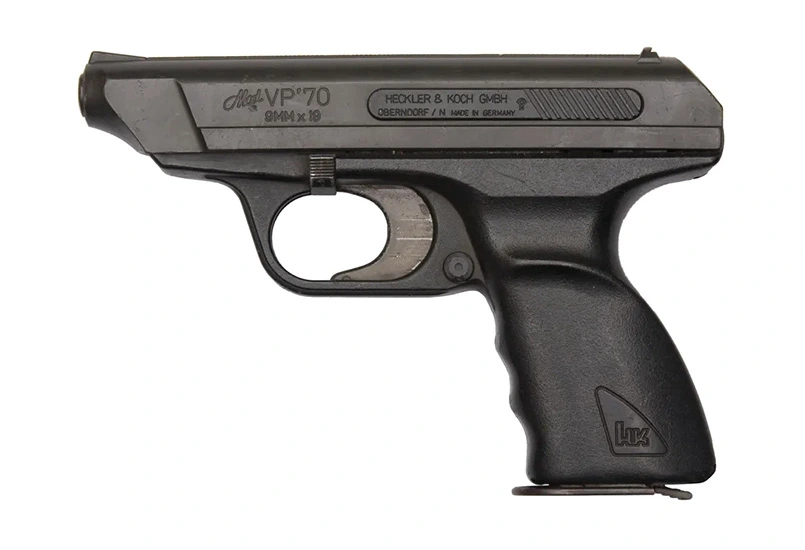
Throughout various points during the film the Heckler and Koch VP70 pistol can be seen in use. This was a futuristic design at the time during the late 80's but like the S&W M39, very hard to sorce as an off the shelf airsoft replica. For both sidearms, a 3D printed model would be the most viable route to take.
Weapons are naturally the the most important part of a USCM build. Carrying another weapon will break and ruin the classic US Colonial Marine look. It is worth deciding early how far you want to go here, as everything else in the loadout is easier to change later.
Accessories are where a US Colonial Marine loadout starts to feel lived-in rather than assembled. None of these items are essential on their own, but together they add context and credibility.
Most of these pieces are carried rather than actively used, and several only appear briefly in the film. That does not make them wrong to include. It simply means they should support the loadout rather than dominate it.
The M40 grenades are worn by the USCM grunt, carried on the chest of the body armour in webbing shell hoops. The Grenades would be fired from the underslung grenade launcher on the M41A pulse rifle.
For this build, the grenades were 3D printed as static props. The proportions and colour do most of the work, and they integrate naturally with existing webbing or plate carrier setups.
As with other accessories, they add context rather than defining the loadout.
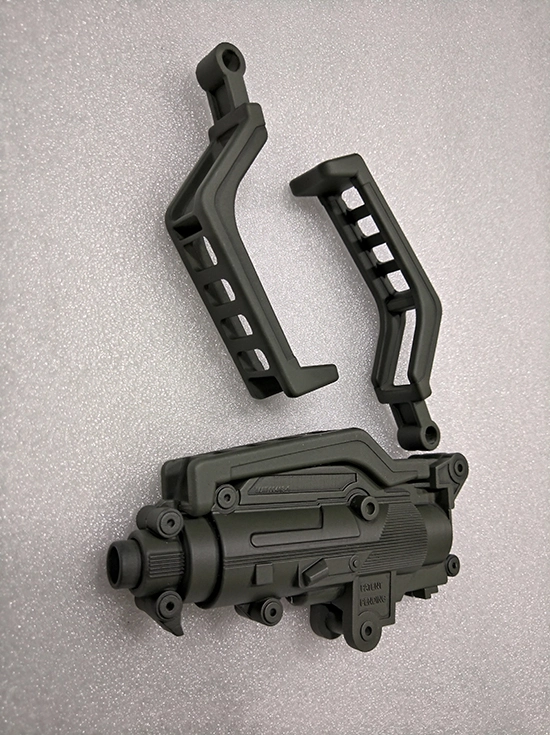
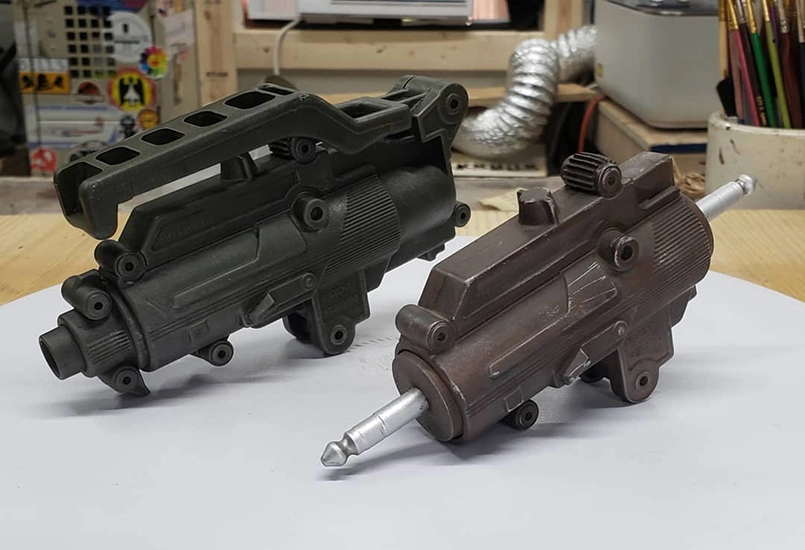
The belt tool is a small but distinctive piece of USCM kit. It appears clipped to webbing and belts throughout the film and is often overlooked in builds.
It is essentially a compact utility device rather than a weapon, and it works well as a static prop. From a distance, the shape and placement are enough to sell it.
The belt tool is straightforward to 3D print and does not need to be functional. It exists to add visual texture to the loadout rather than to be interacted with.
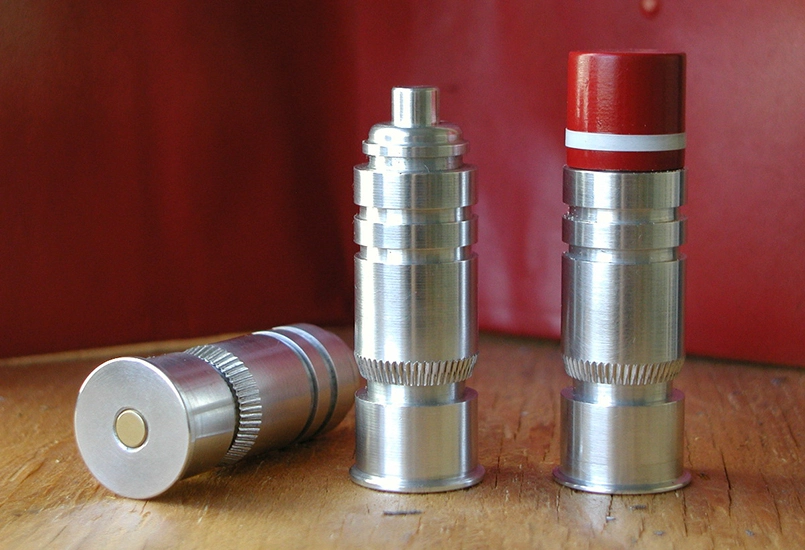
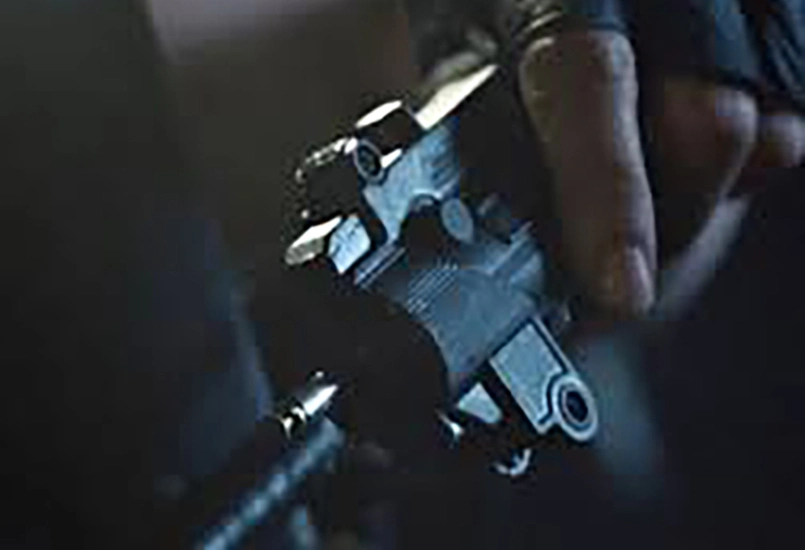
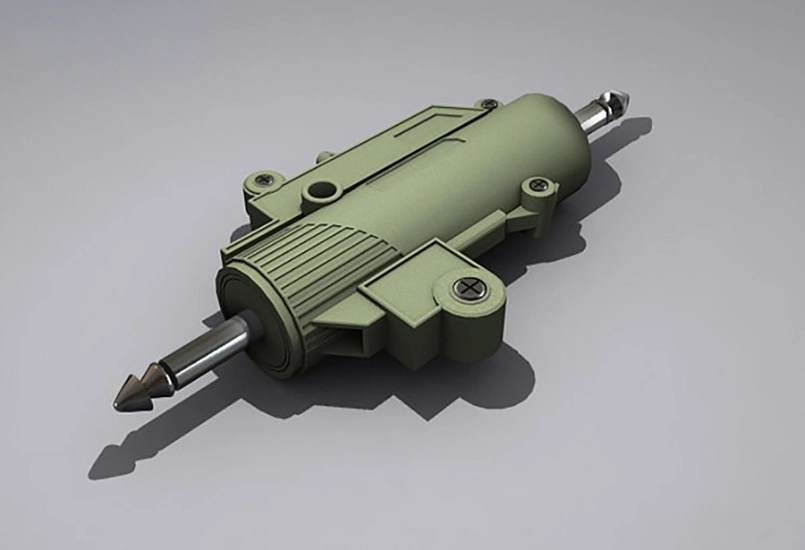
The DV9 battery is specific to the M56 Smartgun and is associated with the power feed and disconnect sequence seen in the film.
Visually, it closely resembles the belt tool, with the addition of connectors at either end. For prop purposes, it can be treated as a variant of the same base form.
As with the belt tool, this works perfectly well as a static prop. Its value is in reference and recognition rather than function.
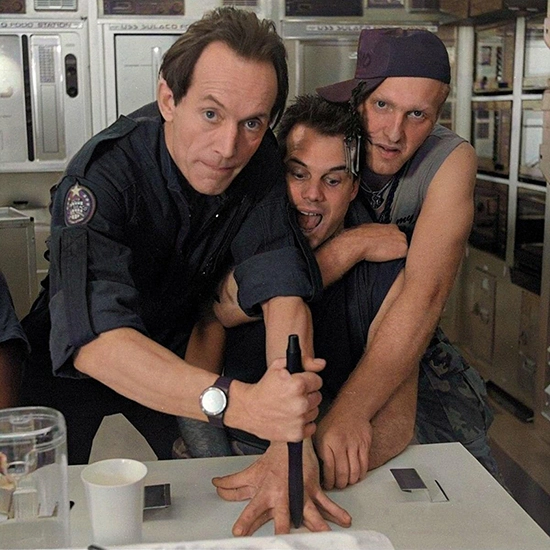
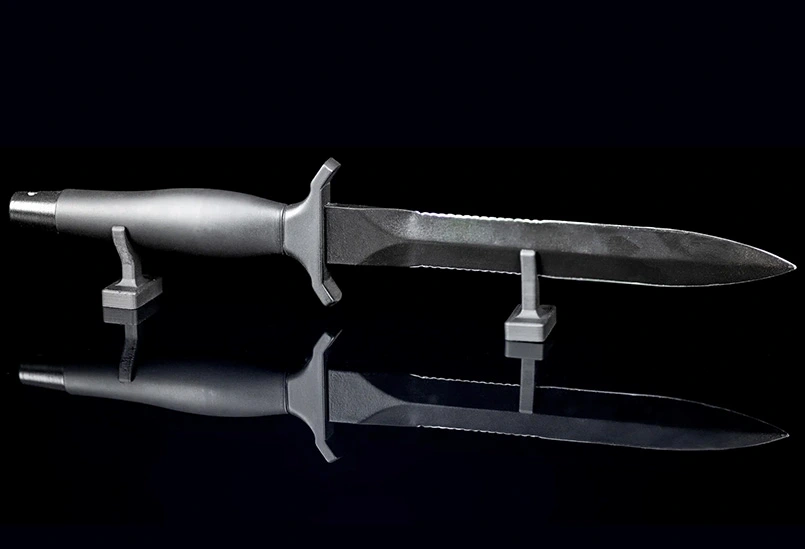
The commando-style Gerber Mk2 dagger is only briefly seen in the film, most notably in the Hudson and Bishop scene rather than during combat.
It is an optional detail and should be treated as such. Including it adds depth for those familiar with the film, but omitting it does not weaken the overall loadout.
For event use, the dagger should always be a safe prop. Flexible materials such as TPU or foam are appropriate if it needs to be carried openly. A rigid or sharp replica has no place in a live environment.
Like many accessories, the dagger works best when it looks like it belongs to the kit rather than being highlighted.
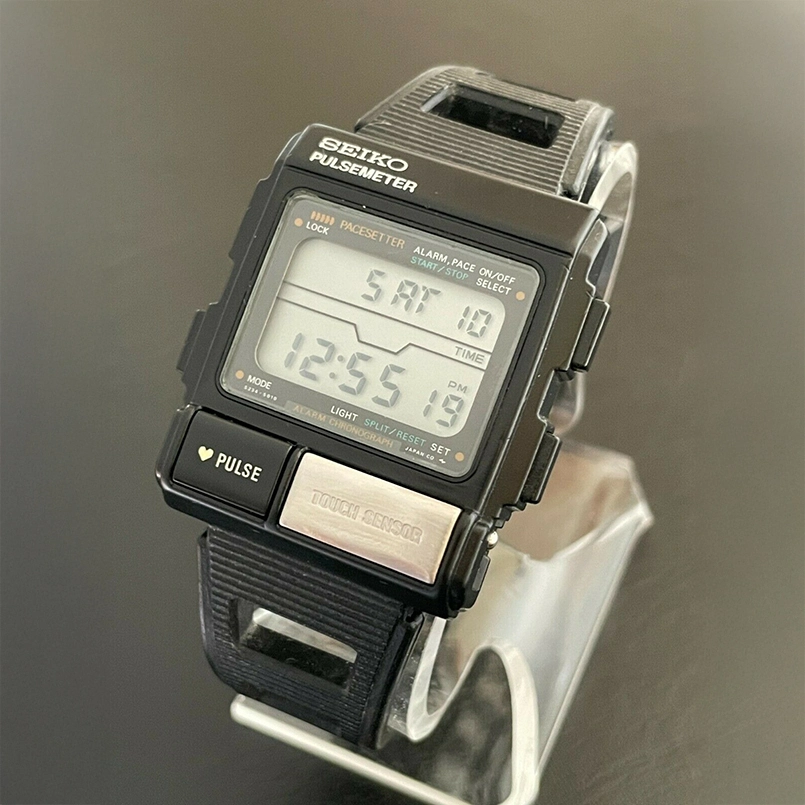
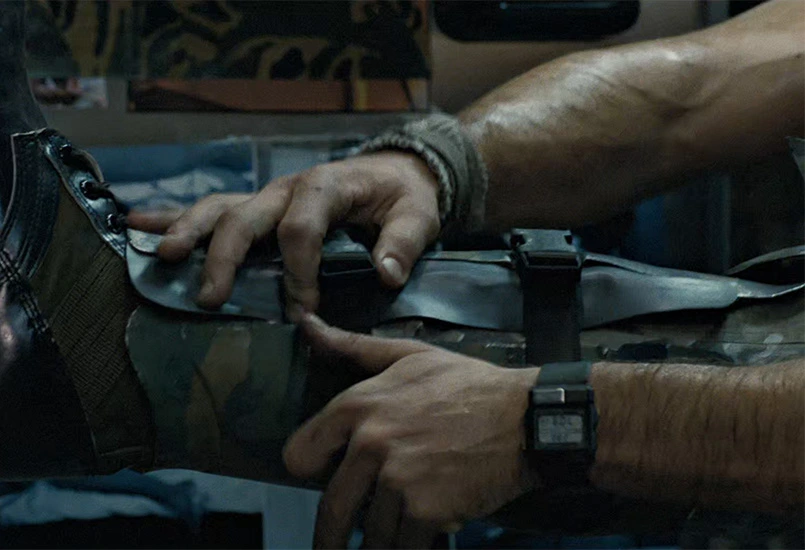
The Sekio Pulsemeter watch is a small background detail, but it is one of those pieces that quietly reinforces the Aliens aesthetic. It can be seen in the movie when a USCM is tightening the straps on his leg brace armour before they head out to Hadley’s Hope.
In the film it appears as a chunky digital watch worn by USCM. It fits the wider industrial, near-future look rather than reading as specialist kit.
The exact model is the Seiko S234-501A Pulsemeter watch. Originals are now hard to find and very expensive as they are now considered to be rare collectors items.
For most builds, this is not something worth chasing. From a practical point of view, a period-appropriate digital watch with a bulky case shape achieves the same visual effect when worn naturally as part of the loadout.
If you enjoy prop research and want a little side project, the S234-501A Pulsemeter watch is an interesting rabbit hole to jump down. Otherwise, it is best treated as a subtle nod rather than a requirement.
At some point the question becomes unavoidable: "How much will it actually cost to build a US Colonial Marine loadout?"
The answer depends almost entirely on how far you want to go. Once you decide whether you are aiming for a 10 metre rule build, a practical mid-tier build, or a screen-accuracy build, the cost profile changes very quickly.
The table below shows realistic ballpark figures for each role and build tier. These are not exact prices and they do not include optional extras like the Motion Trackers and ME3 welder. They are intended to show how cost behaves once certain decisions are made.
| Build tier | Grunt | Hicks | Smartgunner |
|---|---|---|---|
| 10m rule budget build | ~£310 | ~£325 | ~£565 |
| Mid-tier practical build | ~£705 | ~£830 | ~£1,600 |
| All-in screen accuracy build | ~£1,370 | ~£1,490 | £5,000+ |
The first thing to notice is how small the cost difference is between Grunt and Hicks builds. The addition of a shotgun and a few accessories nudges the price up, but it does not fundamentally change the build.
The second thing to notice is how sharply the Smartgunner diverges. Even at the lowest tier, the scale of the weapon and the need for a support rig create an immediate step change. At higher tiers, this gap widens rapidly.
Screen accuracy does not scale linearly. Pushing closer to what was seen on film often means chasing donor parts, rare screen originals, and refined finishes. Each of those steps adds time and cost without necessarily changing how the loadout reads at a distance.
The motion tracker is a good example of this. At the 10 metre rule tier, a static 3D printed tracker at around £25 is sufficient. At the mid-tier and above, a fully functional tracker can be built for around £86. Beyond that point, spending more brings diminishing returns.
Most of the cost difference between tiers does not come from small props. It comes from committing to one or two large decisions early on, particularly around weapons, armour construction, and how far you intend to push accuracy.
If there is one takeaway from these figures, it is that deciding your target tier early will save both money and frustration. Almost everything else in the loadout can be upgraded later.
With the full US Colonial Marine loadout now covered, the next step is to start building your own! Here is a list of useful guides to help you on your journey to becoming a US Colonial Marine.
| Guide | Link |
|---|---|
| Internet Movie Firearms Database | imfdb |
| Motion Tracker build guide | Harry Badger - Motion Tracker build guide |
| M56 Smartgun project build guide | Harry Badger - M56 Smartgun build guide |
| ME3 Welder project build guide | Harry Badger - ME3 Welder build guide |
| Prop maker | Chefs Creations |
| Fan creators site | RPF |
| AVP creators pages | Facebook page |
For completeness, this a list of links to source either ready made versions of the loadout components, the 3D models, or materials for building your own US Colonial Marine.
| Item | Link |
|---|---|
| Helmet - Steel M1 | Aliexpress |
| Helmet - 3D Model | Cults3D |
| Helmet Liner | Epic Militaria |
| Camo Trousers/Pants - Genuine camo | Chefs Creations |
| Camo Trousers/Pants - Polish Desert camo | Military First |
| Camo Trousers/Pants - Multicam | Preppers Shop |
| Camo Shirt - Genuine camo | Chefs Creations |
| Camo Shirt - Genuine camo | Military First |
| Camo Shirt - Multicam | Preppers Shop |
| Sleeveless shirt | Military First |
| Body Armour - Pattern | SKS Props |
| Body Armour - 3D Model | Cults3D |
| Body Armour - Made | Chefs Creations |
| Shoulder Lamp | Cults3D |
| Motion Tracker | Thingiverse |
| ME3 Welder | Thingiverse |
| M41A Pulse Rifle - 3D Model | Cults3D |
| M41A Pulse Rifle - Snow Wolf Replica | BBGun4Less |
| M41A Pulse Rifle - Snow Wolf Body Kit | BBGun4Less |
| M56 Smartgun | Cults3D |
| Smartgun Steadicam arm upgrade | Cults3D |
| Smartgun IR Viewfinder | Cults3D |
| Smartgun aftermark articulated arm | eBay |
| Ithaca 37 Shotgun - Airsoft | Airsoft World |
| Ithaca 37 Shotgun - 3D Model | Thingiverse |
| S&W 39 Pistol - 3D Model | Cults3D |
| S&W 39 Pistol - Prop | Chefs Creations |
| Heckler & Koch VP70 | Thingiverse |
| Heckler & Koch VP70 - Prop | Chefs Creations |
| Flamethrower | Cults3D |
| M40 Grenades | Cults3D |
| Belt Tool | Cults3D |
| Gerber Mk2 Dagger - 3D Model | Cults3D |
| Gerber Mk2 Dagger - Prop | Chefs Creations |
| Ripley Newt Tracker | Cults3D |
| Eagle Patch | Amazon |
| Stars and Stripe Patch | Amazon |
| Stars and Bars Patch | Amazon |
| U.S.C.M Unit patch | eBay |
Building a US Colonial Marine loadout is ultimately about choosing where to stop as much as where to begin. You can chase accuracy, practicality, or somewhere in between, and none of those choices are wrong. The important thing is understanding what actually carries the look, what costs time and money, and what can be left for later. If this guide has helped you make those decisions with a bit more confidence, then it has done its job.