Simple and effective mount for attaching a GoPro to a baseball cap
When I started playing airsoft, recording gameplay felt like an obvious next step. First-person footage is immersive and useful, both for memories and for learning. The problem was how to mount a GoPro so it captured what I was actually looking at without dictating what I had to wear. Helmets worked technically, but they forced a specific look. Chest mounts were worse, constantly blocked by hands, weapons, or movement. A baseball cap felt like the most neutral option. Everyone owns one, and it works across airsoft, hiking, biking, and everyday use.
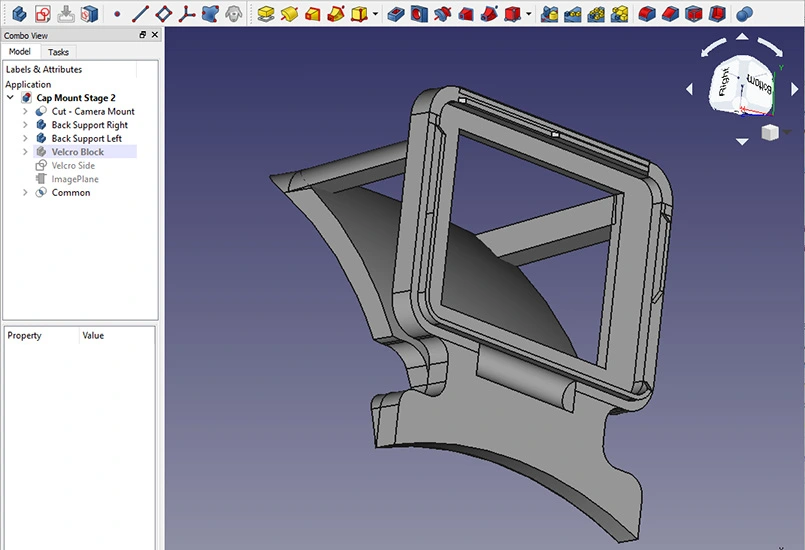
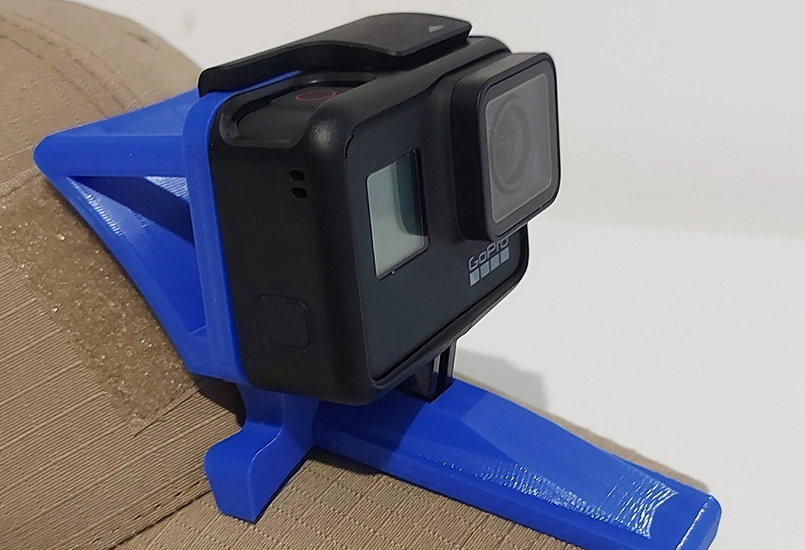
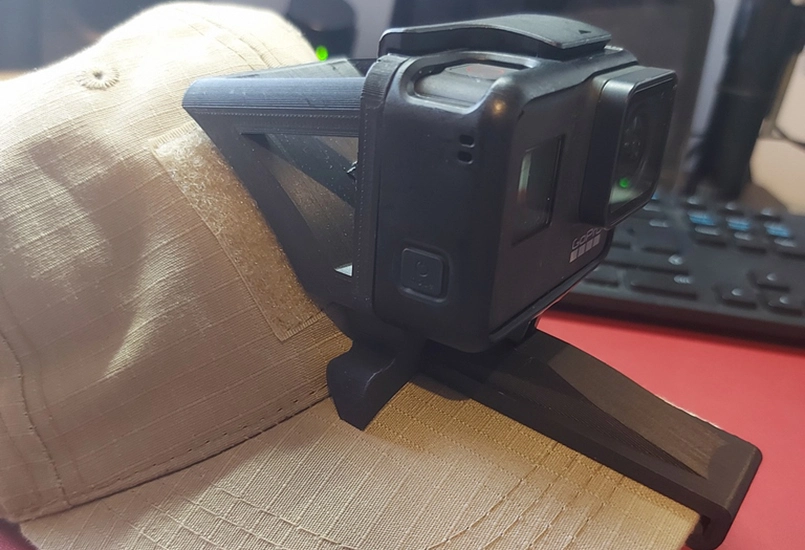
I found a low-profile cap-mounted solution that did exactly what I wanted. It sat on top of the peak, hugged the shape of the cap, and kept the camera close to eye line. The problem was cost. By the time materials, manufacturing fees, shipping, and import charges were added, the price became absurd. That was the moment the question shifted from “should I buy this” to “can I make this”.
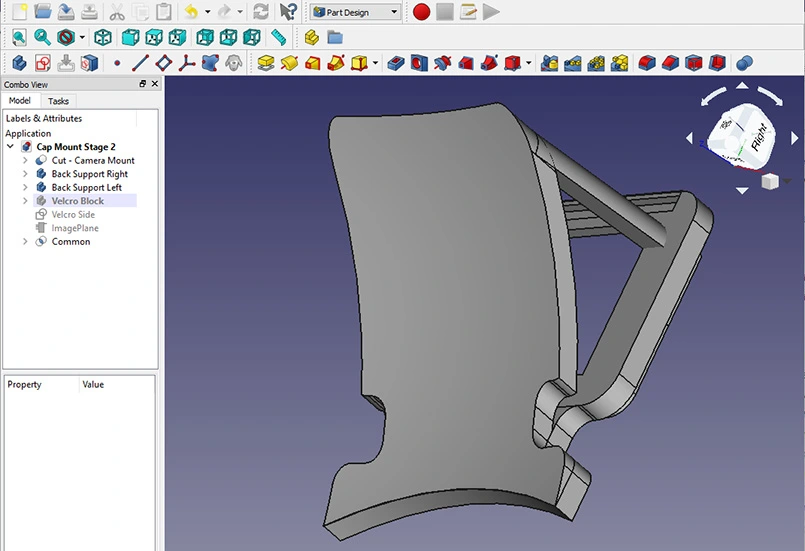
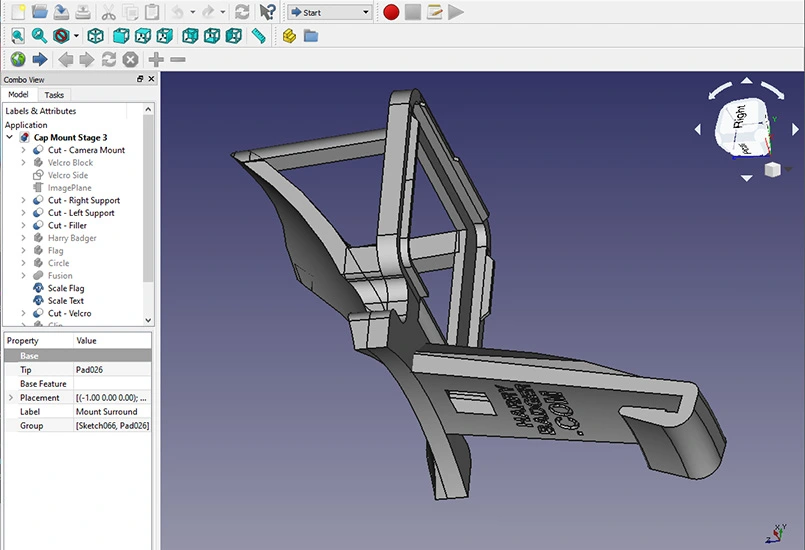
The honest reason I bought my first 3D printer was this project. I assumed I could relearn CAD quickly, print a part, and be done. That assumption was wrong, but useful. I bought a Creality Ender 3 open-frame printer, found FreeCAD, and started modelling from scratch. This was my first real attempt at designing something that had to clip, flex, align, and survive use. It was also my first exposure to slicers, supports, bed adhesion, layer height, and print orientation.
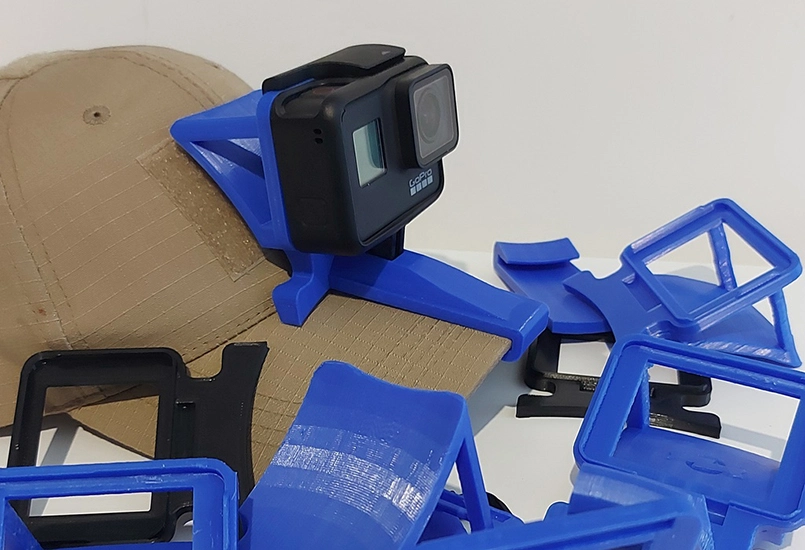
The early prints were bad. They looked bad and behaved worse. Orientation choices caused weak points. PLA snapped where stress concentrated. Supports left scars. Some prints worked visually but failed the moment they were clipped onto a camera. Each failure forced another redesign. Slowly, the mount became functional. Not elegant, not durable, but functional enough to use.
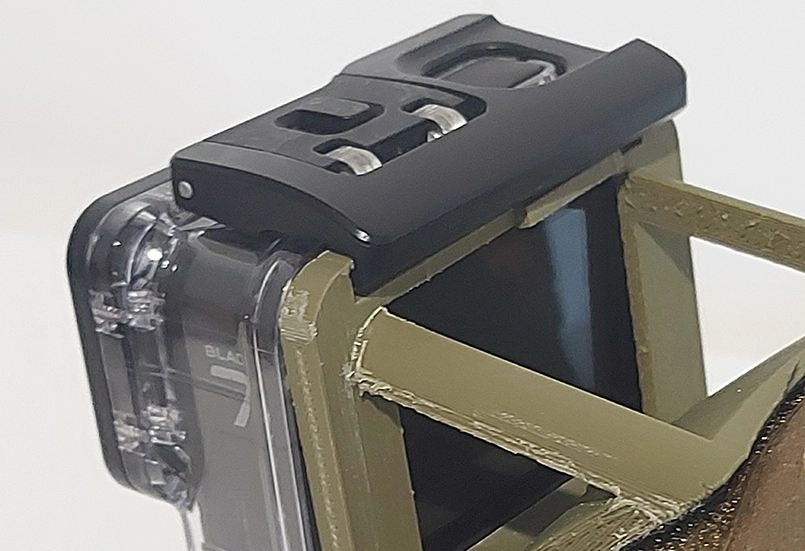
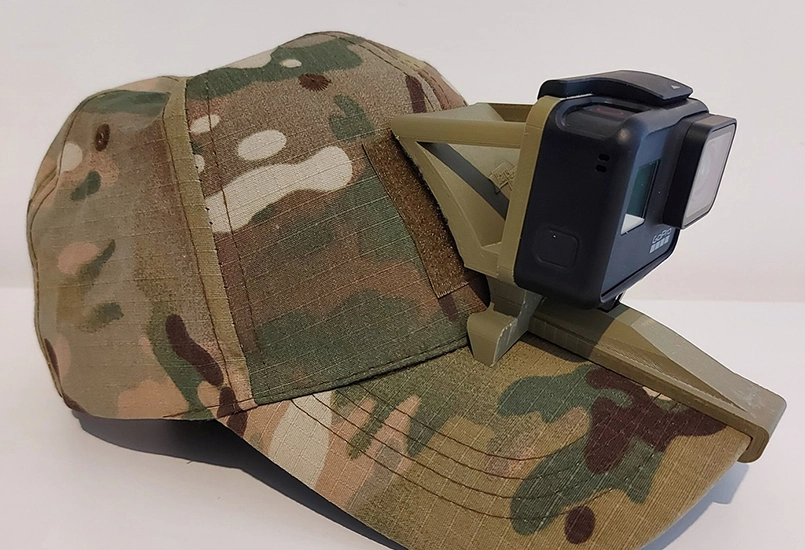
The mount saw real use across multiple airsoft games. Positioned close to the forehead, the centre of gravity was better than expected. With wide or ultra-wide camera settings and in-camera stabilisation, the footage was usable and stable while moving at pace. Framing worked well when upright, but aiming down sights filled the frame with weapon and ground. That was a trade-off I accepted. The mount favoured discretion and comfort over perfect footage in every scenario.
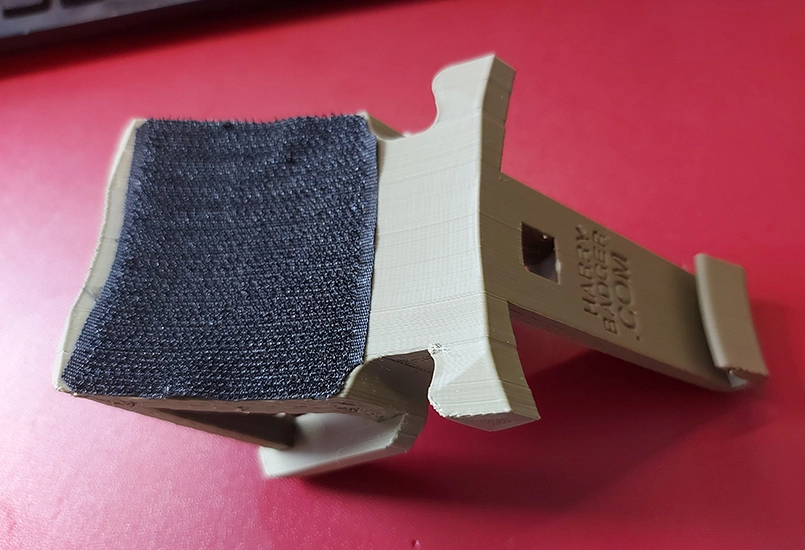
Every failure happened in the same place. The rear section that interfaced with the GoPro skeleton case took the most stress. Opening the sprung clip too aggressively fractured the print along layer lines. The cap clip, spine, and stabilising wings survived without issue. This was my first clear lesson that print orientation and material choice are structural decisions, not cosmetic ones.
Friends asked for copies. I printed a few, free, in exchange for feedback that never came. When theirs broke, they wanted replacements. That was the point I realised I had no interest in manufacturing, support, or obligation. I enjoy making things for myself. I do not enjoy being responsible for them once they leave my hands.
The problem was solved well enough for my needs. New projects arrived and demanded attention. This one did not fail. It simply stopped being interesting compared to what came next.
This was my first full CAD project, my first tolerance-driven design, and my first hard lesson in material limits. More importantly, it changed how I look at objects. I stopped seeing prints as shapes and started seeing stress paths, failure points, and compromises. Everything that followed traces back to this cap mount.